-
Guides to Uninstall CPU-Z Program from the Computer
- Dec 24,2019
- Utilities & Operating Systems
-
Do you know how can uninstall CPU-Z from Windows? Does any problem or error occur and make you cannot remove it with success? The following how-to guides will list some available ways to help you get rid of it from the PC.
About CPU-Z program
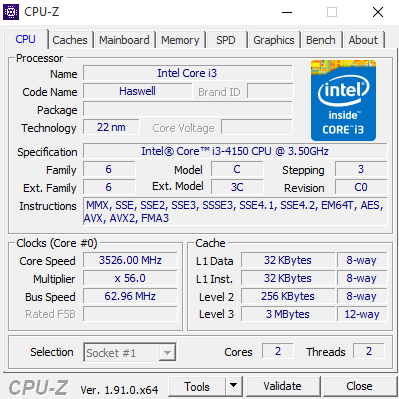
CPU-Z is a program that can show a complete data sheet about the computer system’s information and different features. For instance, you can get detailed information about the processor’s name, vendor, various features, package and those various features.

Common reasons for people removing the application
- CPU-Z gets no use on the computer right now
- The program itself encounters a problem and should be uninstalled first
- Need of reinstalling the software
- People need to remove some unnecessary programs to free up some disk space
Problems usually encounter when uninstall the app
- Some stubborn files and components of the program cannot be deleted completely
- CPU-Z does not display on the programs list of Windows’ Programs and Features
- The program’s removing process usually crash suddenly and display an error code
- Cannot find CPU-Z’s uninstall process or the installation folder on the PC
How can uninstall CPU-Z for good from Windows
1.Take manual steps to remove it via Windows removing feature
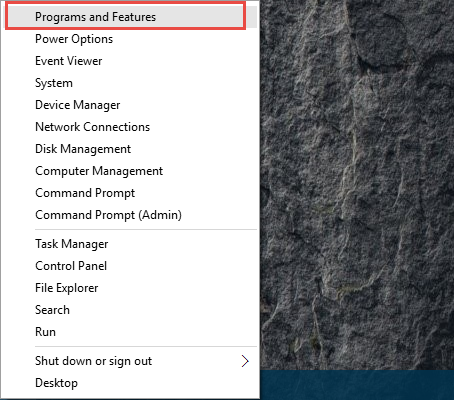
- Right-click on the Start/Windows button to open Power User menu
- Select Programs and Features at the top, you will go to the Windows built-in removing feature
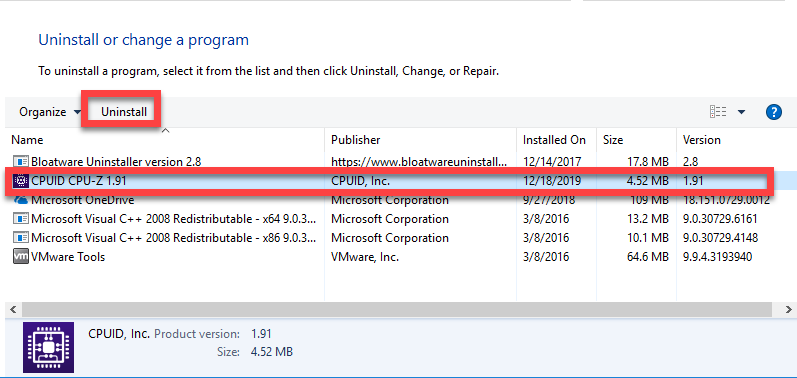
- Select CPU-Z on the list, and click on Uninstall
- Click Yes to be sure that you want to completely remove CPU-Z

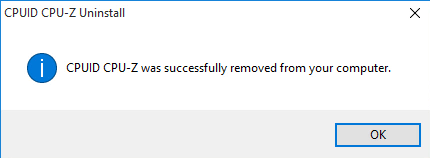
- Then the removing process will start, when finish, click OK to close the set up
- Restart the computer, and then log in again
- Click on the Search box on the taskbar, and type “regedit”
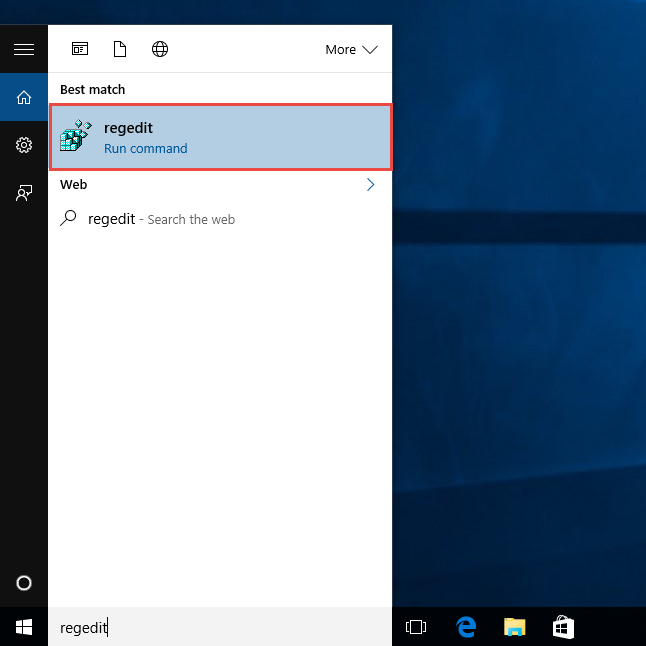
- Press Enter key, you will be able to open the Registry Editor
- Expand every registry ground on the left pane, find CPU-Z’s associated registry entries from the list, and delete them
(Note: if you are worry about deleting a wrong file, you can export the file you are going to delete for back-up)
If you cannot find CPU-Z on the programs list
Some people might encounter the program does not appear on the programs list of Windows removing feature, in this case, you can try to find and launch the program’s uninstall process for a try.
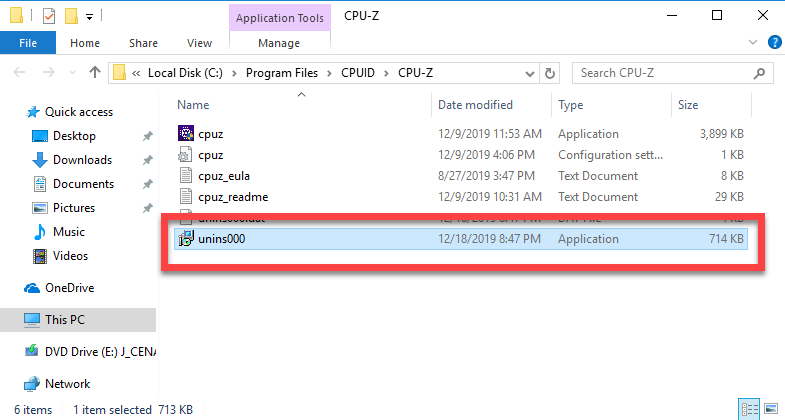
- Open the installation folder of CPU-Z. If you are not clear about where it is, try to right-click on CPU-Z’s shortcut on the desktop — Open file location
- Scroll down and double-click on “unins000” in the folder
- Follow the removing instructions to complete the uninstallation, and then reboot the computer
- After then, you should go do clean its remnant registry keys likewise
2.Take advanced removal tool to uninstall CPU-Z more effectively
To remove CPU-Z without leaving those stubborn files on the computer, you can take a smart uninstaller to perform the app removal for you. And Bloatware Uninstaller is able to scan all leftovers of CPU-Z, and support users to remove them automatically.
- Start a registered version of Bloatware Uninstaller on the computer, and click on Run Analysis button
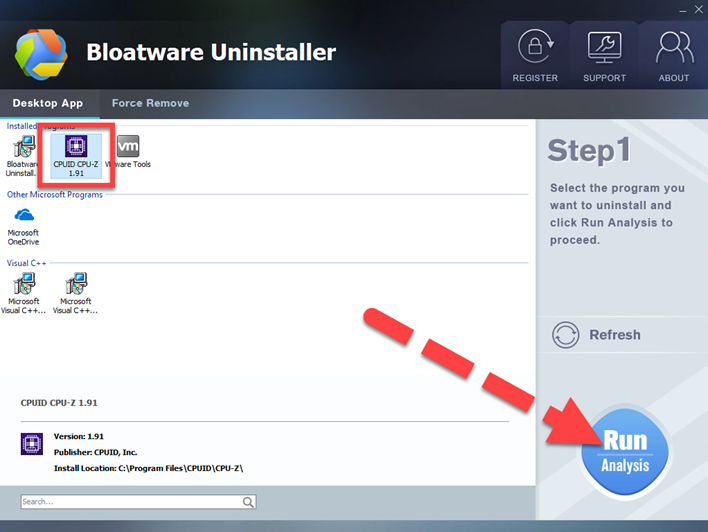
- After that, you will see all installed files of the program detected on the list, click Complete Uninstall button to continue
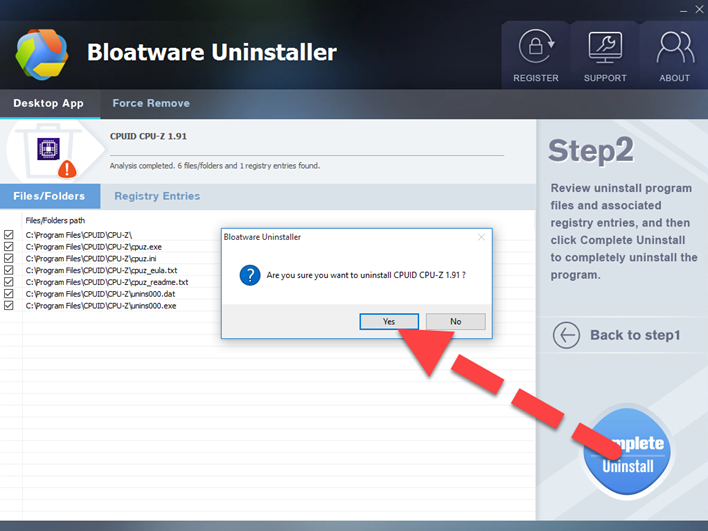
- Click Yes on the new pop-up to confirm the program removal, and follow the removal wizard to finish the standard uninstallation
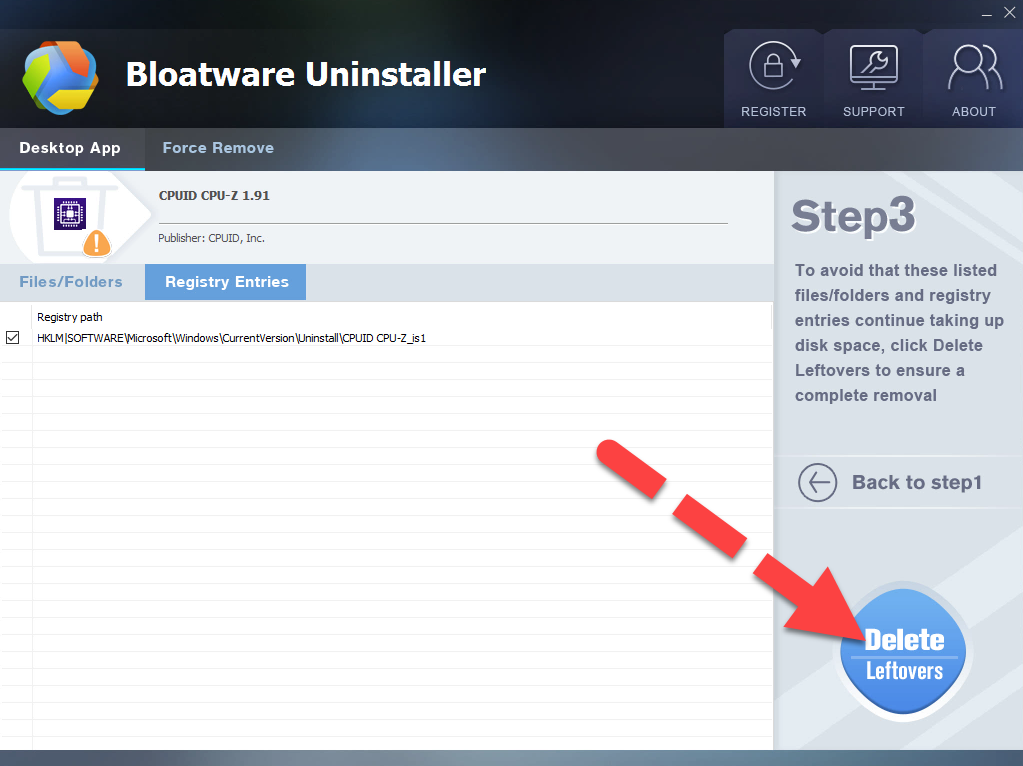
- Next, click Scan Leftovers button to scan for all stubborn files
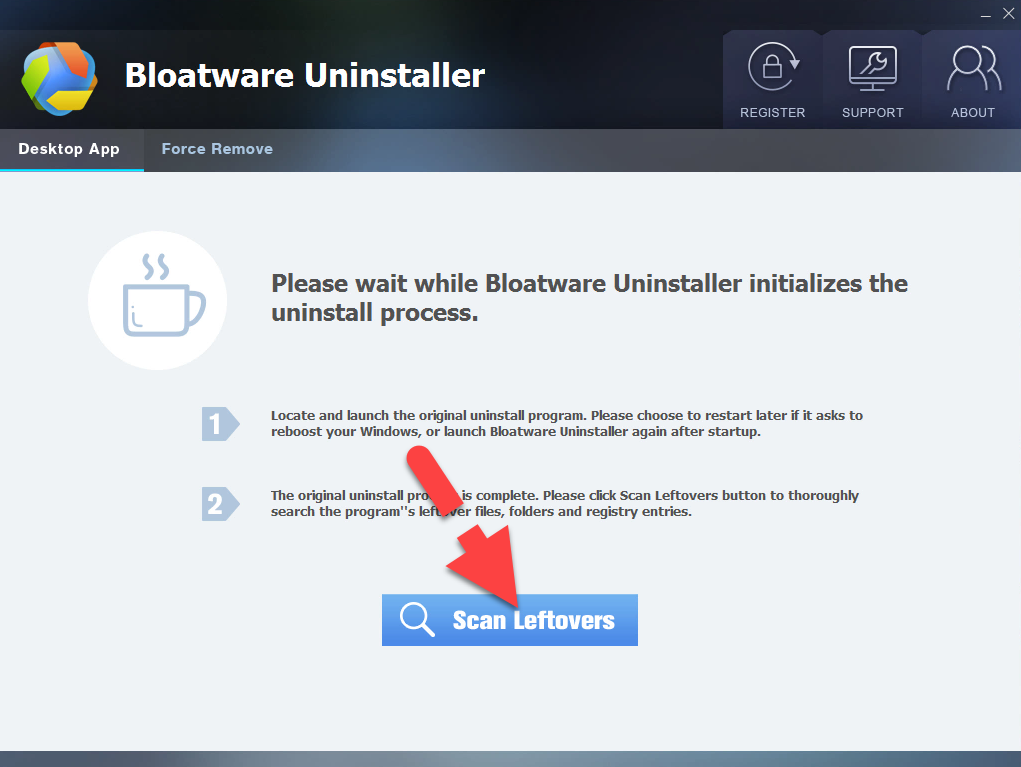
- Click Delete Leftovers button to erase all of these files, and you will be able to completely uninstall CPU-Z on the computer.
Categories
- Acer Software
- Anti-Spyware
- Antivirus Programs
- ASUS Software
- Browsers
- Business Software
- CD Burners
- Cloud Storage
- Communication Tools
- Compression Tools
- Desktop Customization
- Desktop Enhancements
- Developer Tools
- Digital Photo Software
- Driver
- Encryption Software
- Games
- HP Software
- Intel Software
- Interface Tool
- Internet Security Software Suites
- Internet Software
- Keyboard Drivers
- Lenovo Software
- MP3 & Audio Software
- Networking Software
- News
- Operating Systems & Updates
- Other Browser Add-ons & Plugins
- P2P & File-Sharing Software
- Productivity Software
- Security Software
- SEO Tools
- Text Editing Software
- Uncategorized
- Uninstall Backup Software
- Uninstall Download Software
- Uninstall e-book management software
- Uninstall FTP Software
- Uninstall Graphics Software
- Uninstall Monitoring Software
- Uninstall Office Suite Software
- Uninstall PDF Software
- Uninstall Player
- Uninstall Security Software
- Uninstall Utilities
- Utilities & Operating Systems
- Video Editing
- Video Players
- Video Software
- VNC Software
- Web Browsers
- Windows Tutorial
Archives
- June 2021
- April 2021
- March 2021
- February 2021
- January 2021
- December 2020
- November 2020
- October 2020
- September 2020
- August 2020
- July 2020
- June 2020
- May 2020
- April 2020
- March 2020
- February 2020
- January 2020
- December 2019
- November 2019
- August 2019
- July 2019
- June 2019
- May 2019
- April 2019
- March 2019
- February 2019
- January 2019
- December 2018
- November 2018
- October 2018
- September 2018
- August 2018
- July 2018
- June 2018
- May 2018
- April 2018
- March 2018
- February 2018
- January 2018
- December 2017
- November 2017
- October 2017
- September 2017
Comments
Leave a reply