-
Solved: Can’t Uninstall Webroot SecureAnywhere AntiVirus 2017 Completely From PC
- Oct 26,2017
- Antivirus Programs
-
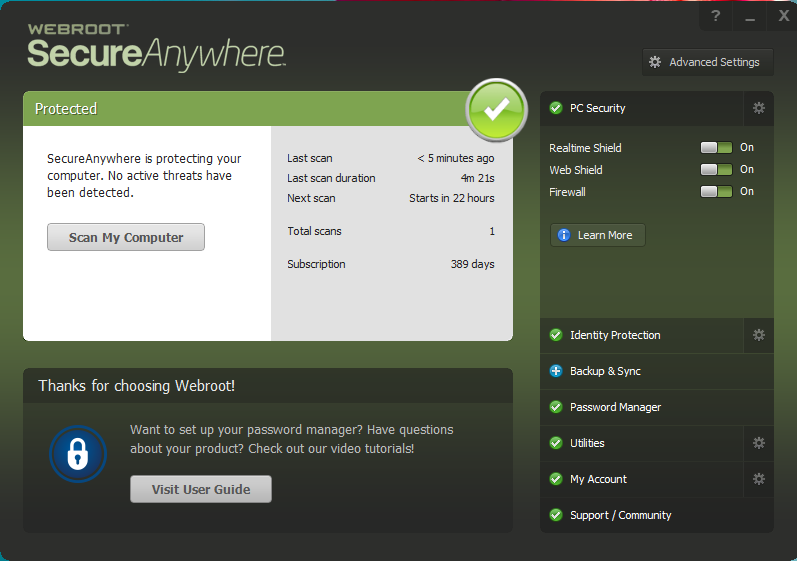
This tutorial will show you how to completely uninstall Webroot SecureAnywhere AntiVirus 2017 from Windows, so take care to read it over.
“I had a trial use and cannot uninstall and I can’t afford it right now. Much worse, I’ve tried the command line removal in safe mode and still cannot remove.” by Swiftex
If you have the problem like Swiftex, then don’t worry about that, cause you are now eventually in the right place to find out how to exactly uninstall Webroot SecureAnywhere AntiVirus 2017 or Webroot product from your computer.
Webroot SecureAnywhere provides next-generation protection, which protects all the ways you connect on PC, and it is easy to install unless you have got the right keycode or you can’t manage installed. Many of uses have problem when try to uninstall Webroot SecureAnywhere AntiVirus 2017 from computer, no matter what kind of problems you met, there is some way can fully handle with it.
Some problems had occurred during the Webroot SecureAnywhere AntiVirus removal:
- Webroot SecureAnywhere AntiVirus says “Uninstall failed”
- Webroot SecureAnywhere AntiVirus refuses to be removed from computer
- Webroot SecureAnywhere AntiVirus files and registry cannot cleaned thoroughly in computer
- You can’t installed other antivirus apps because of the exist of Webroot AntiVirus
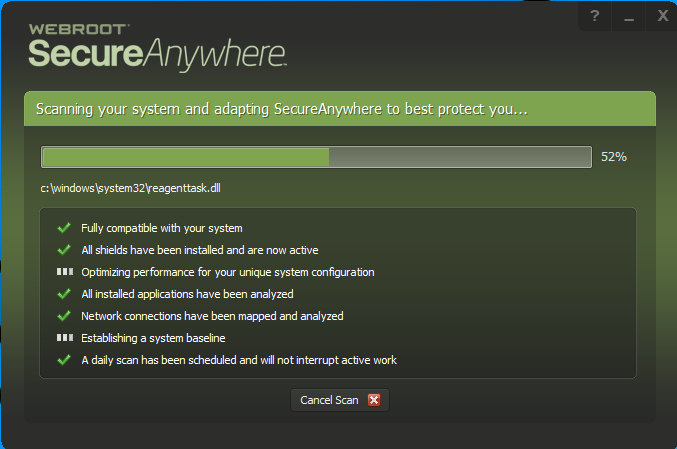
Two solutions to Uninstall Webroot SecureAnywhere AntiVirus 2017
To solve these problems, you need to really uninstall Webroot SecureAnywhere AntiVirus 2017 from your computer, follow step by step of the removal guide to completely eliminate Webroot SecureAnywhere AntiVirus from PC.
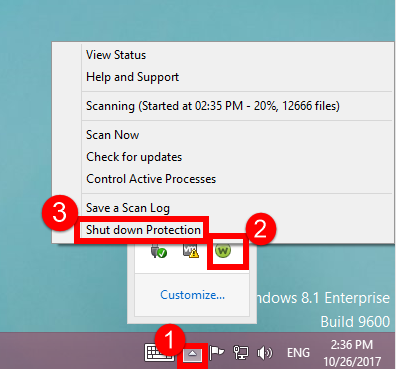
Just in case of the success rate of Webroot SecureAnywhere AntiVirus 2017 removal, make sure to exit the running Webroot firstly if possible:
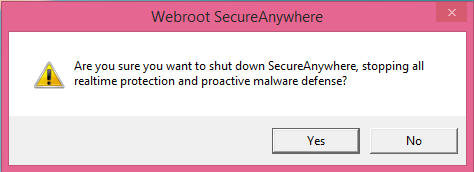
1. Go to the taskbar on the lower right corner>> click the triangle icon to open the hidden apps >> select Webroot SecureAnywhere AntiVirus >> right click to choose “Shut Down Protection”.
2. Click the taskbar >> choose Task Manager >> select the related processes with Webroot SecureAnywhere AntiVirus >> click End Task.


Easy (Auto) Solution to Uninstall Webroot SecureAnywhere AntiVirus 2017
If you have failed many times in uninstalling Webroot SecureAnywhere AntiVirus 2017, then I suggest you try this tool help for only three simple steps that can handle all of your unwanted programs in Windows. Of course you need to download a third party application, but put your heart down, is absolutely 100% safe in your computer.
(After successful installation and register of Bloatware Uninstaller > Launch it.)
Start the removal tour in three simple steps:
Step 1: Select the target.
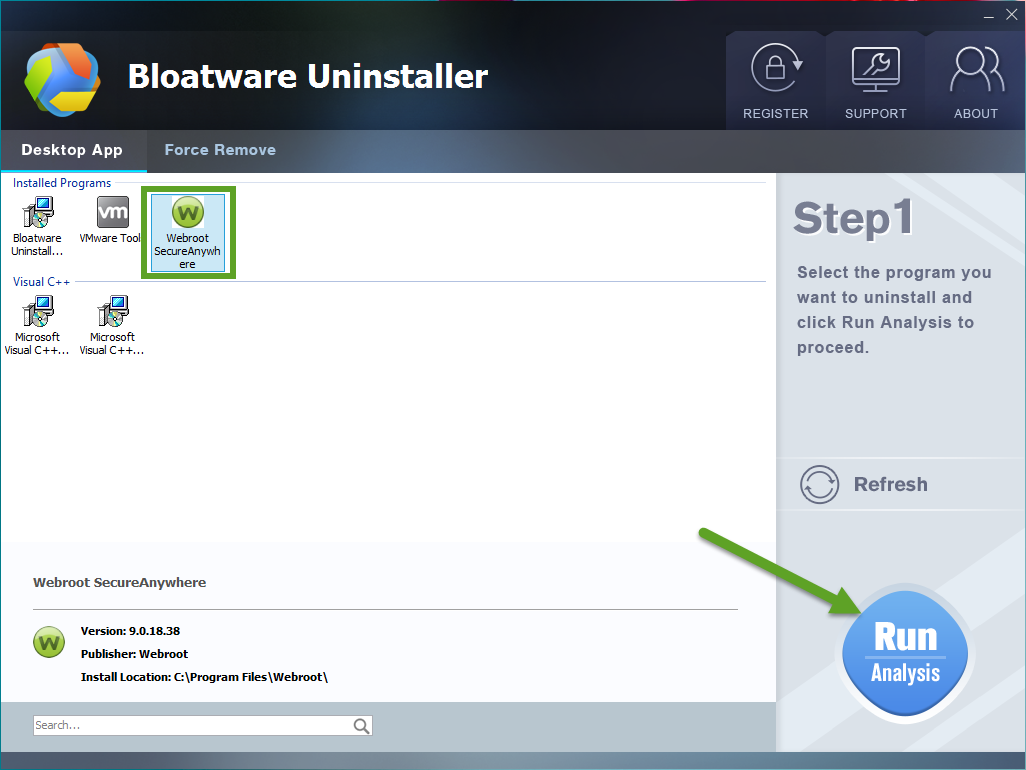
Run the removal tool, select the target “Webroot SecureAnywhere AntiVirus 2017”, then click the button “Run Analyze”;
Step 2: Scan related components.
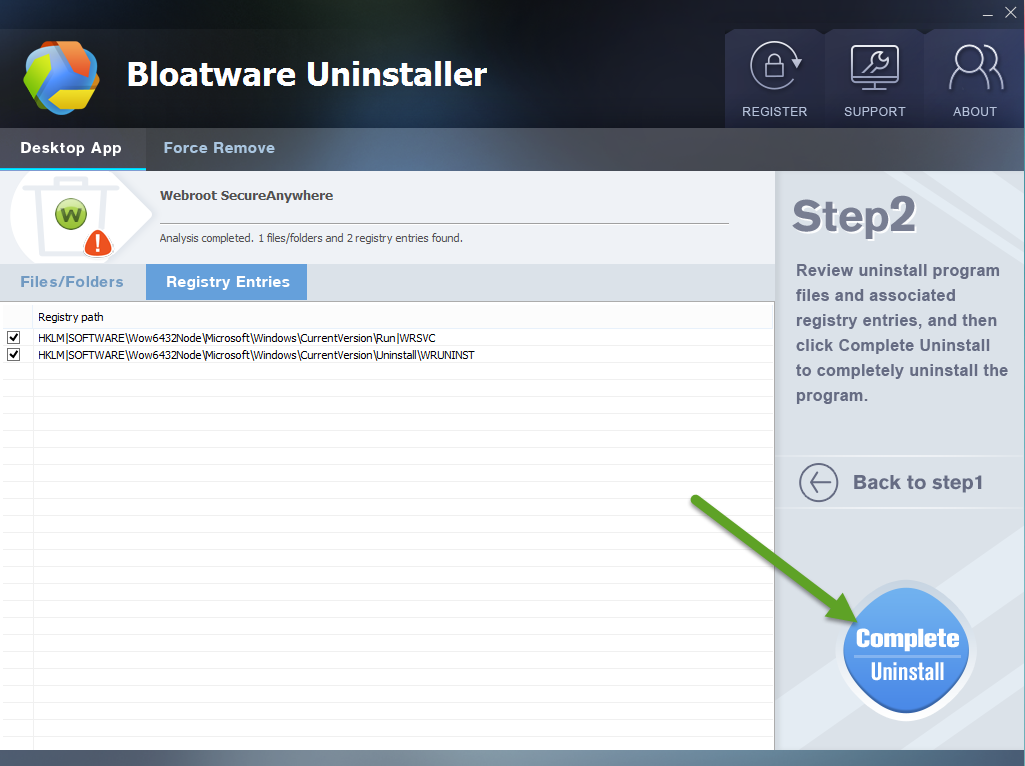
Easily click the button Complete Uninstall to conduct the regular removal of scanning files/folders of Webroot SecureAnywhere AntiVirus 2017. Then click Yes to delete all leftovers scanned in uninstaller;
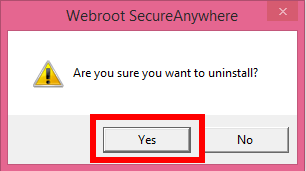
Just allow the uninstall process to run by clicking “Yes“.
Step 3: Delete leftovers
A few minutes later by getting through improvement by Webroot SecureAnywhere AntiVirus 2017, and then easily click on the button of “Delete Leftovers”, click Yes to confirm your removal.
Spend a few minutes to watch the full process video of uninstalling Webroot SecureAnywhere AntiVirus 2017 with BU from PC bellow:
Congratulations, Webroot SecureAnywhere AntiVirus 2017 has been successfully removed from your PC altogether with its leftovers, including 1200 files/folders and 306 registry entries are gone for good.
Manual Solution to Remove Webroot SecureAnywhere AntiVirus 2017
You can uninstall Webroot SecureAnywhere AntiVirus 2017 with manual approach via Programs and Features of course, but take care, many users have failed in this method like paragraph I.
1. Reboot your computer system into Safe Mode
Better restart your computer into Safe Mode and use the Administrator account to run the system before performing Webroot SecureAnywhere AntiVirus removal.
If you don’t know how to reboot your computer into Safe Mode in Windows 7/8/10, then check the previous story for help.
2. Uninstall Webroot AntiVirus from Programs and Features:
- Click the Menu bar, then click down arrow;
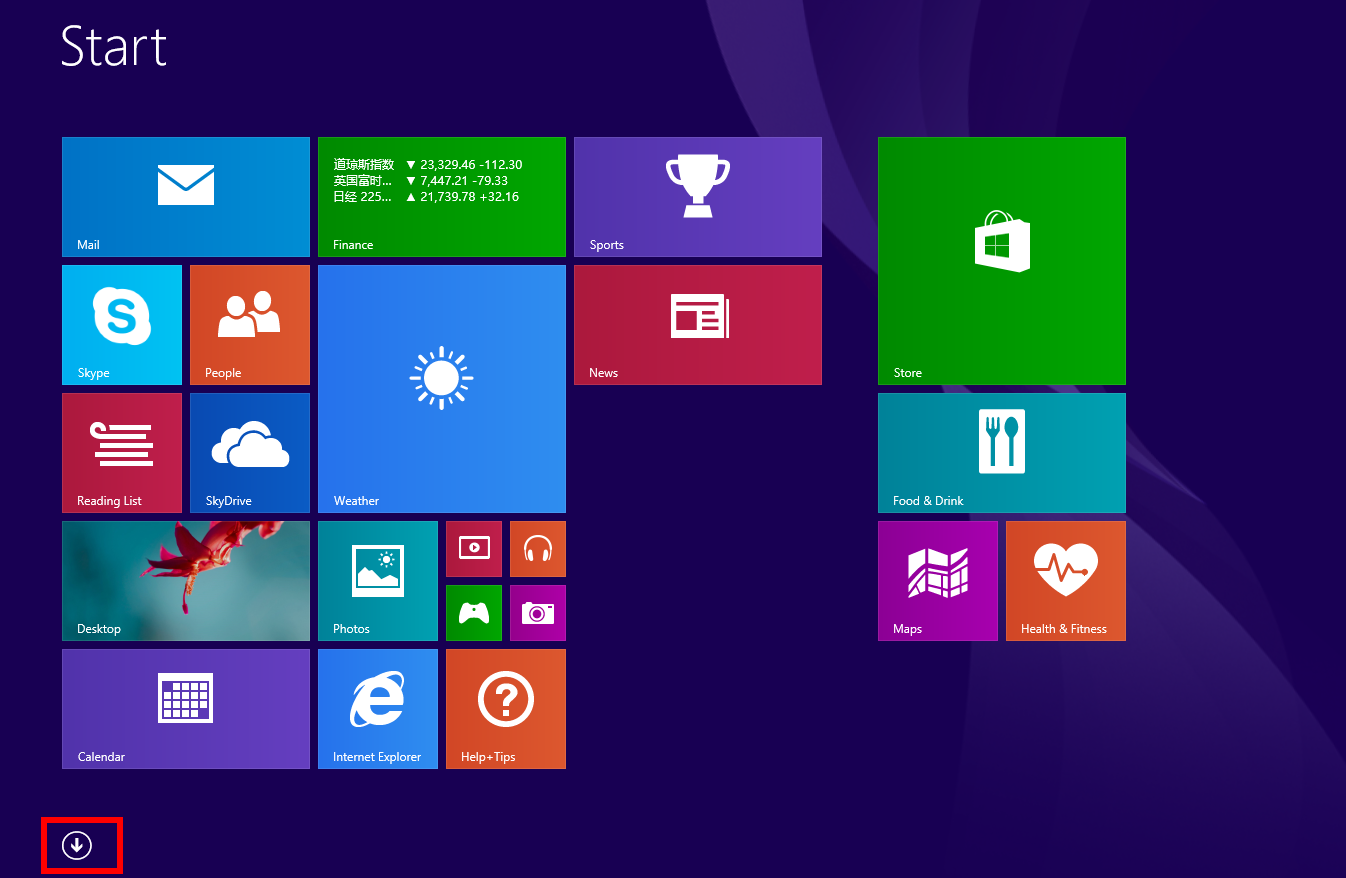
- Right click Webroot SecureAnywhere AntiVirus 2017 icon, right click it;
- Choose Uninstall button;
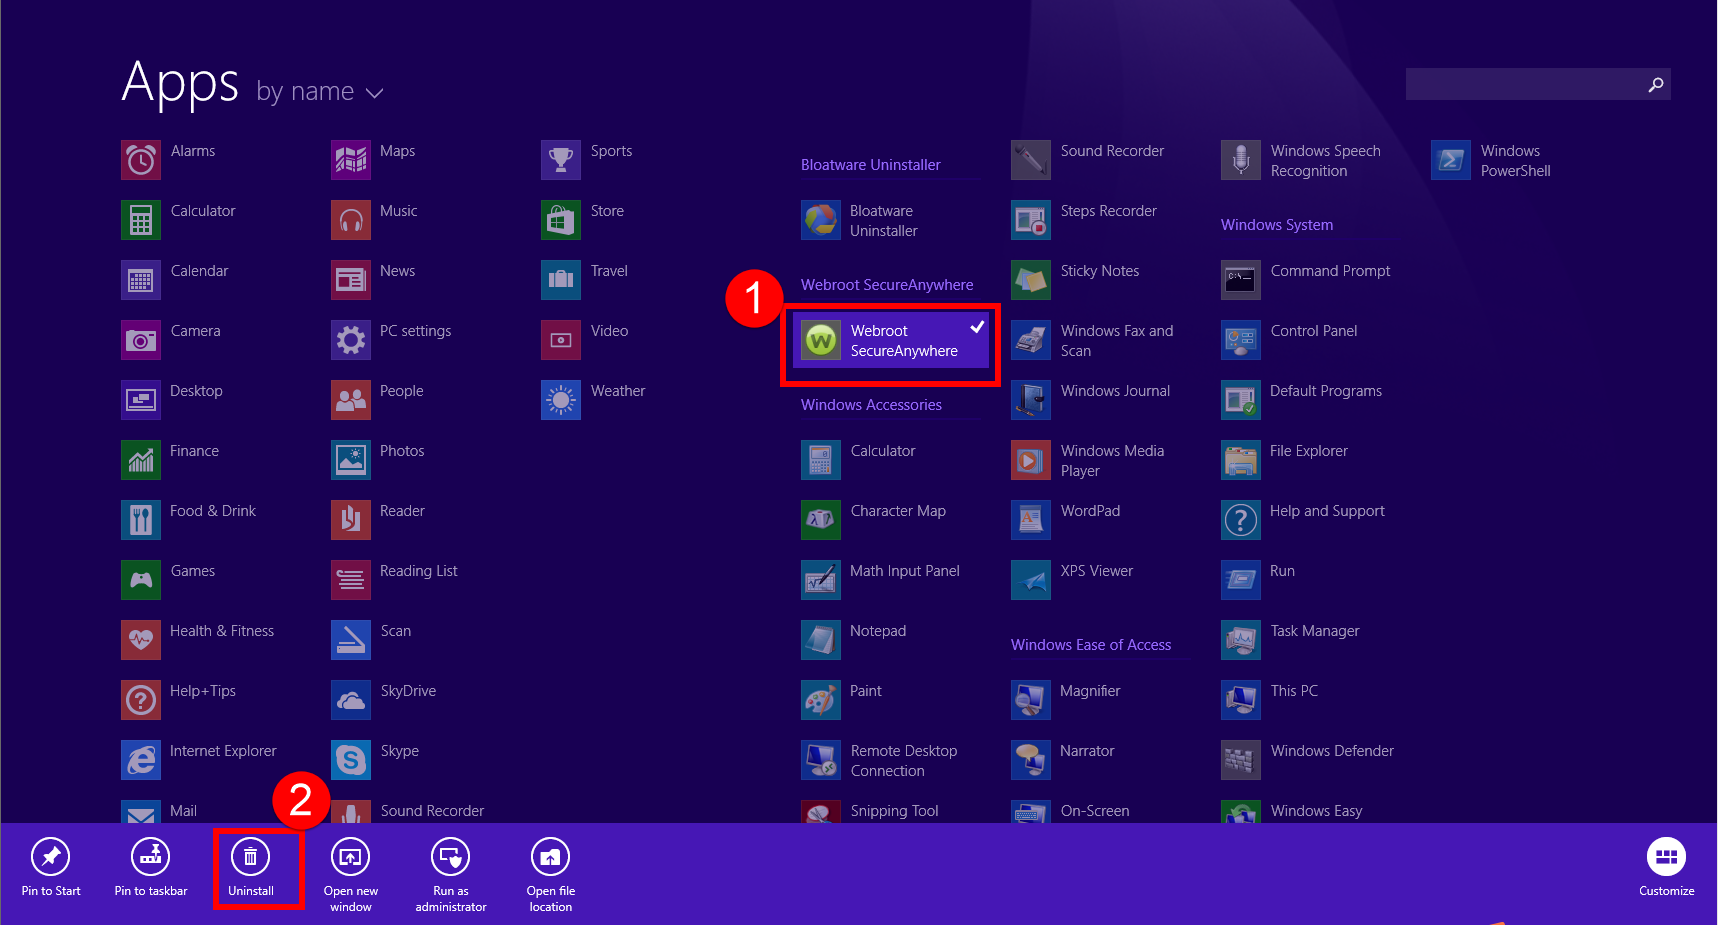
- Then you move to Programs and Features window;
- In fact, you can also launch Programs and Features window by clicking Programs and Features option from the menu bar as you see;
- From the interface of Programs and Features , select target Webroot SecureAnywhere AntiVirus 2017 icon;
- Choose the Uninstall /Change or right click choose Uninstall, are the same option;
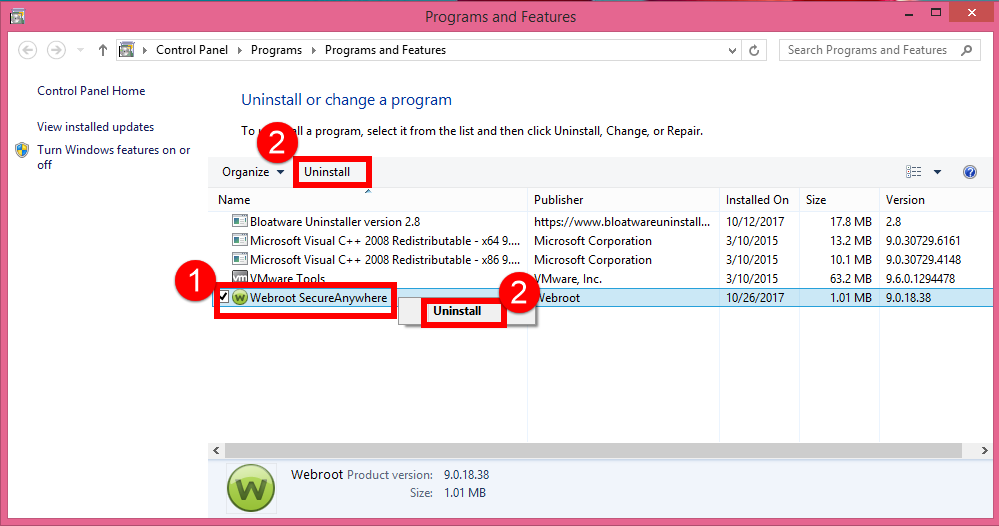
- Allow the uninstall process to run by clicking “Yes“;

- Type the verification code to confirm removal;
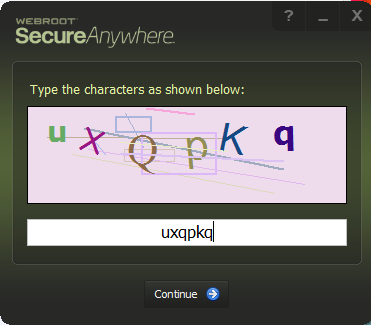
Now that you removed Webroot SecureAnywhere from Programs and Features, you have to reboot your computer before the changes take place. Better now than later.
3. Delete its related files/folders and registry entries
- Go the Star Menu ;
- Hit Run;
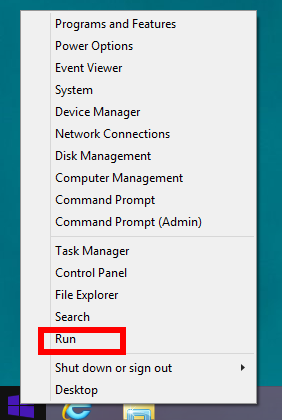
- Type “regedit” in the Open box,
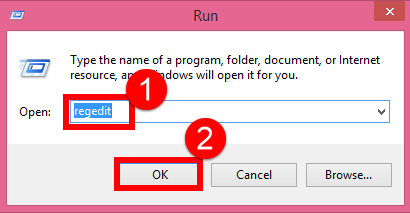
- hit OK to Confirm the opening of Registry Editor window;
- Press the shortcuts of Ctrl + F to open the search box;
- Type the program name “Webroot SecureAnywhere AntiVirus 2017 / Webroot / SecureAnywhere” in the box;
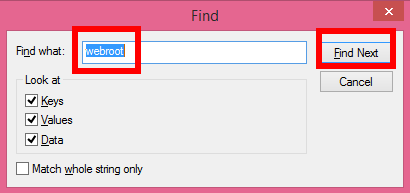
- Delete the target file once it has been searched out;
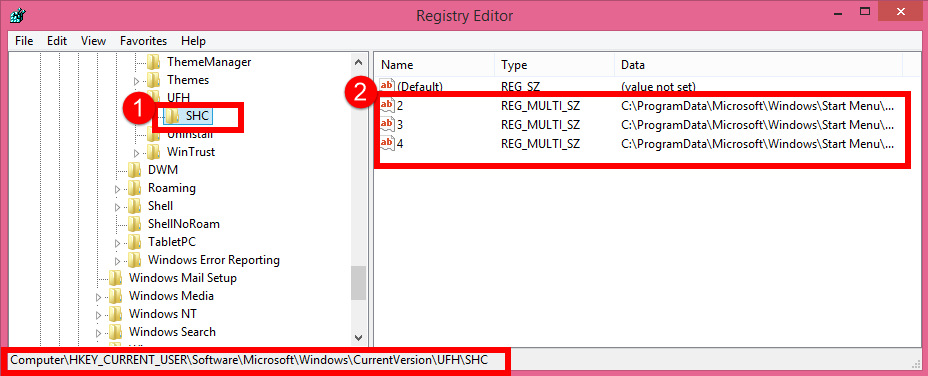
- Repeat the same steps in Searching and deleting registry files in all FIVE folders;
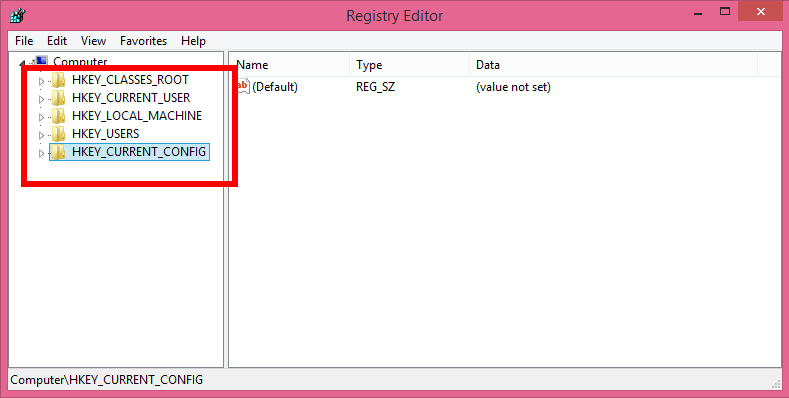
- Finished when the dialog popup saying “finishing searching”;
- Reboot your computer to confirm removal.
Note: You’d better back up registry in your Windows in case you have deleted wrong registry during the elimination of Webroot SecureAnywhere AntiVirus registry entries.
Now, choose one option to fast uninstall Webroot SecureAnywhere AntiVirus 2017 from PC.
Categories
- Acer Software
- Anti-Spyware
- Antivirus Programs
- ASUS Software
- Browsers
- Business Software
- CD Burners
- Cloud Storage
- Communication Tools
- Compression Tools
- Desktop Customization
- Desktop Enhancements
- Developer Tools
- Digital Photo Software
- Driver
- Encryption Software
- Games
- HP Software
- Intel Software
- Interface Tool
- Internet Security Software Suites
- Internet Software
- Keyboard Drivers
- Lenovo Software
- MP3 & Audio Software
- Networking Software
- News
- Operating Systems & Updates
- Other Browser Add-ons & Plugins
- P2P & File-Sharing Software
- Productivity Software
- Security Software
- SEO Tools
- Text Editing Software
- Uncategorized
- Uninstall Backup Software
- Uninstall Download Software
- Uninstall e-book management software
- Uninstall FTP Software
- Uninstall Graphics Software
- Uninstall Monitoring Software
- Uninstall Office Suite Software
- Uninstall PDF Software
- Uninstall Player
- Uninstall Security Software
- Uninstall Utilities
- Utilities & Operating Systems
- Video Editing
- Video Players
- Video Software
- VNC Software
- Web Browsers
- Windows Tutorial
Archives
- June 2021
- April 2021
- March 2021
- February 2021
- January 2021
- December 2020
- November 2020
- October 2020
- September 2020
- August 2020
- July 2020
- June 2020
- May 2020
- April 2020
- March 2020
- February 2020
- January 2020
- December 2019
- November 2019
- August 2019
- July 2019
- June 2019
- May 2019
- April 2019
- March 2019
- February 2019
- January 2019
- December 2018
- November 2018
- October 2018
- September 2018
- August 2018
- July 2018
- June 2018
- May 2018
- April 2018
- March 2018
- February 2018
- January 2018
- December 2017
- November 2017
- October 2017
- September 2017

Comments
Leave a reply