-
How to Remove Intel PRO/Wireless Driver, Uninstall any Bloatware on PC
- Sep 21,2018
- Driver
-
“I am trying to uninstall version 14.3 of Intel PRO/Wireless Driver so I can install the new 15.3 version.
It always fails with the message of Error 1721. This occurs whether I try to repair, change, uninstall or upgrade directly to the new version.
How can I fix this? How can I completely remove Intel PRO/Wireless Driver from my computer?”
Don’t worry, this page will offer the certain methods to remove Intel PRO/Wireless Driver on PC, if you want to learn more, keep on reading now.
1. Remove Intel PRO/Wireless Driver via Control Panel
Just follow the instruction both from Manual & Automatic process to remove Intel PRO/Wireless Driver step by step.
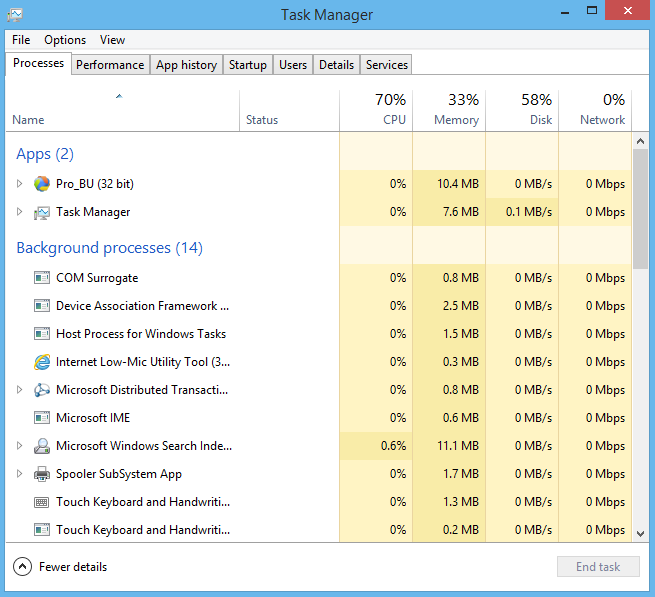
Step 1. End task of Intel PRO/Wireless Driver
Before you start removing Intel PRO/Wireless Driver, it’s required to shut down everything related Intel PRO/Wireless Driver software.
- Hold Ctrl, Shift and Esc keys on the keyboard to open Task Manager. Then click on the related process and click End Process (in Windows 7, Vista) or End Task (in Windows 8) button.
Step 2. Negative the Control Panel to remove Intel PRO/Wireless Driver
In Windows Vista and Windows 7:
- Click Start, type uninstall a program in the Search programs and files box and then click the result.
In Windows 8, Windows 8.1:
- Open Win X menu by holding Windows and X keys together, and then click Programs and Features.
In Windows 10:
- Click “Start” button, then select “App and Features“.
Step 3. Negative the uninstallation
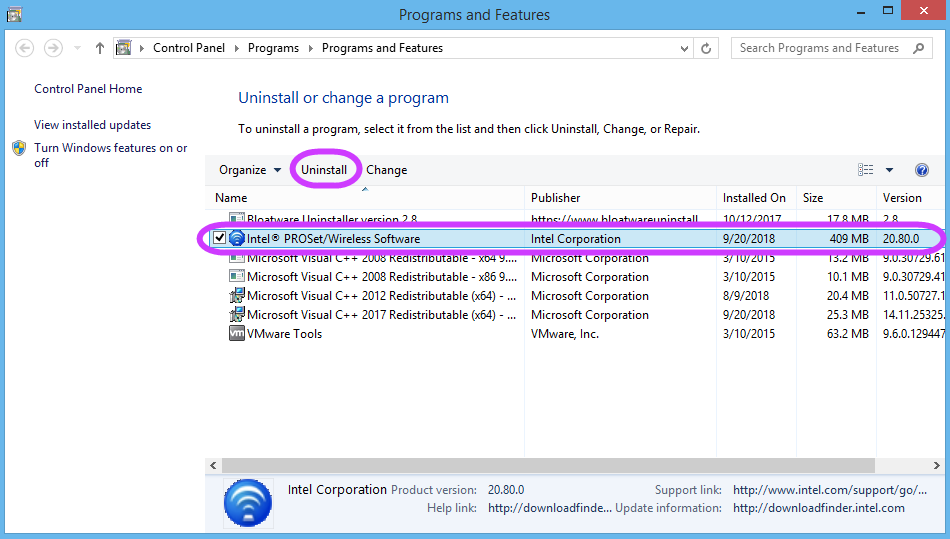
- Now you can see a software installed list of your computer, scroll through the list,
- and locate the program (Intel PRO/Wireless Driver) you want to remove.
- Then click Uninstall to initiate the uninstallation.
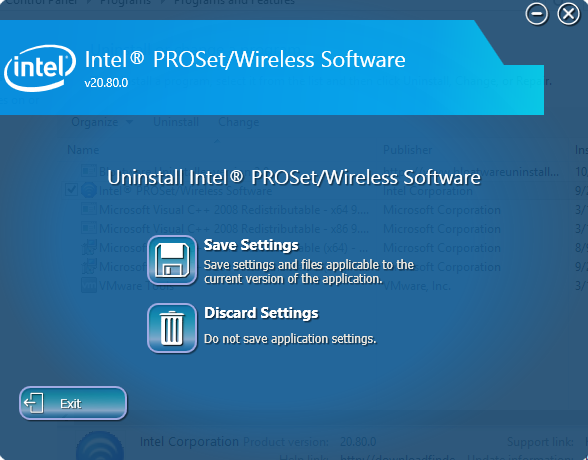
- Click YES to proceed the removal, and choose the option:
Discard Settings
Do not save application settingsIf you are not going to install the software again
- Wait for your computer to finish uninstalling process;
- And close the “Programs and Features” window.
- Restart your computer to resume normal functionality of the Windows operating system.
Step 4. Delete Related Leftover Files Manually
If you don’t have a remover installed on your computer to clean the related leftovers files of the target, then you must delete them one by one all on your own.
Like these:
- Delete leftover registry value: Click Start-Run, type in regedit to activate registry editor, locate the below registry keys and values and delete them from the list.
(HKEY_CURRENT_USER\Software\ Intel PRO/Wireless Driver)
(HKEY_LOCAL_MACHINE\Software\ Intel PRO/Wireless Driver)
(HKEY_LOCAL_MACHINE\Software\Microsoft\Windows\CurrentVersion\Run\eg ui)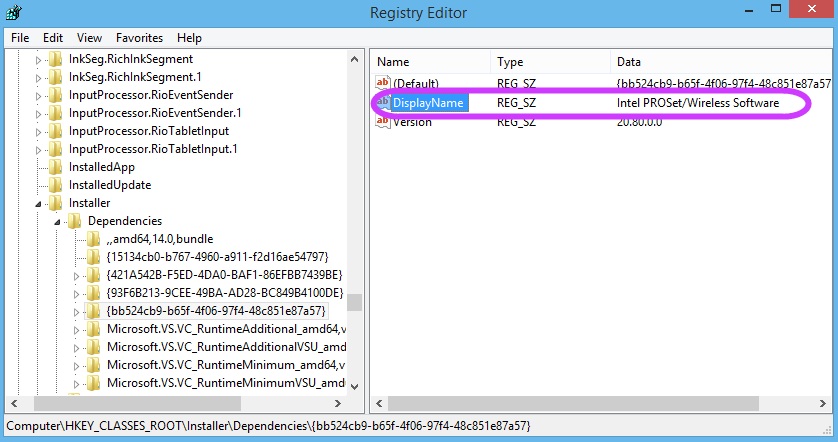
- Delete leftover files: Click on the START – Control Panel, and double click Folder Options, select “Show Hidden Files and Folders”, then locate the blew folders and delete them directly:
(C:\Program Files\)
(C:\Document and Settings\All Users\Application Data\)
(C:\Documents and Settings\%USER%\Application Data\)Unable to manually remove Intel PRO/Wireless Driver
The Windows Upgrade Assistant is instructing me to manually uninstall Intel PRO/Wireless Driver because it is incompatible with Windows 8. I am unable to do that. How could I remove it by other approach except manual process? Could somebody help me how to do?
2. Remove Intel PRO/Wireless Driver via Bloatware remover
Don’t worry, there’s a new way to remove Intel PRO/Wireless Driver, the auto remover can delete the unwanted bloatware software and related leftover files in a short time. Now follow the instruction below to remove it step by step with ease.
- End task of Intel PRO/Wireless Driver as the last part in Method I, then download Bloatware remover, then follow the on screen instruction to install in on your computer.
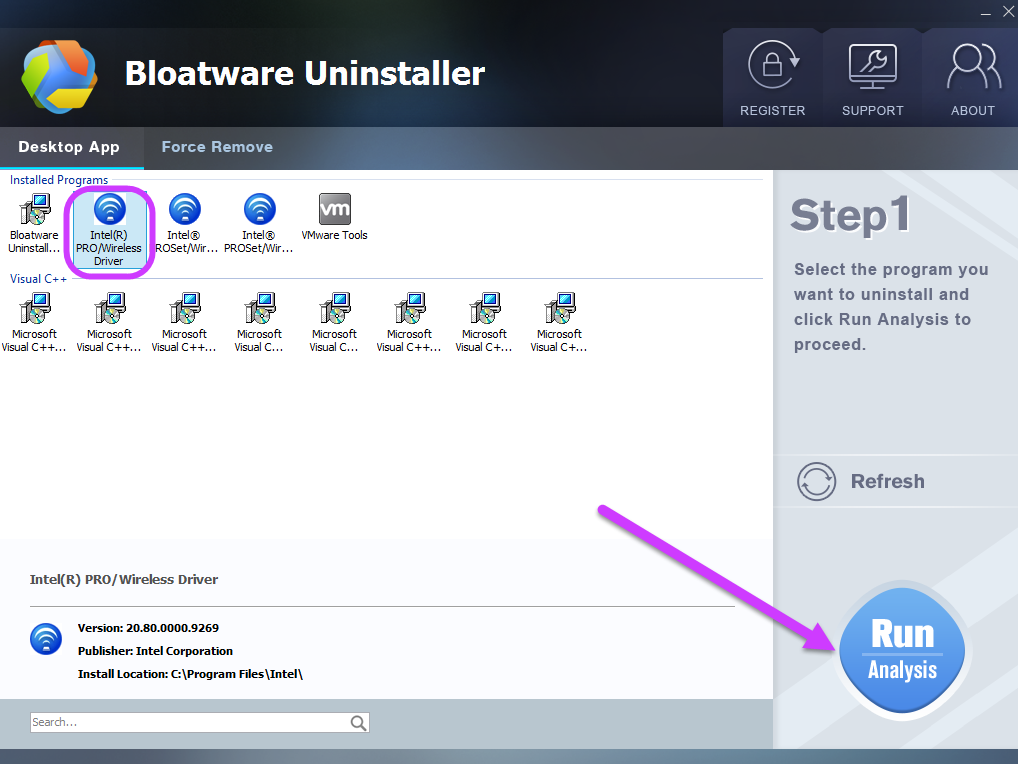
Step 1. Launch Bloatware Uninstaller, find out and select Intel PRO/Wireless Driver on the right hand list, then click “Run Analysis” button.
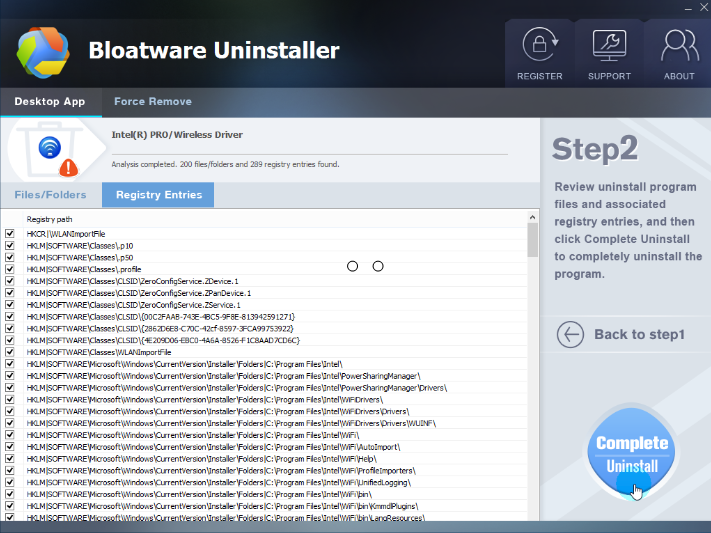
Step 2. The Uninstaller will review the Intel PRO/Wireless Driver related files and registry entries, then click “Complete Uninstall” button, click “Yes” to start uninstalling it.
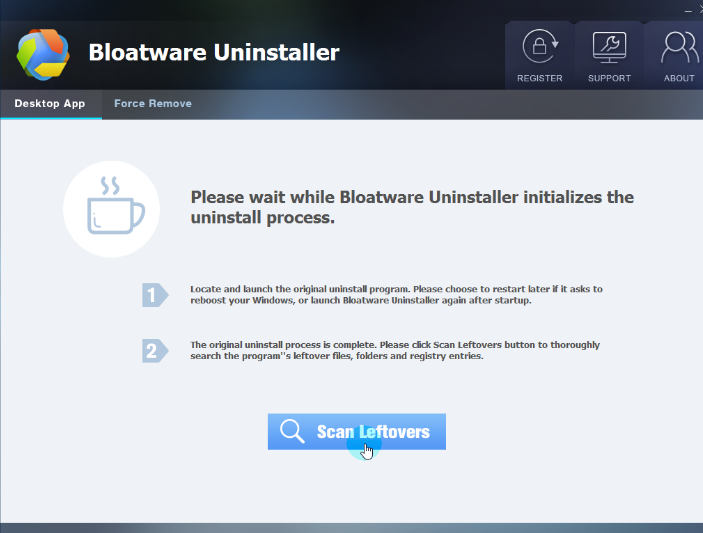
Step 3. Wait for the standard uninstall process completed. Click “Scan Leftovers” button. The Uninstaller has now fully uninstalled Intel PRO/Wireless Driver and deleted all its files and extensions. Click OK to finish.
Learn more in this video:
More tips: How to remove and reinstall Wireless Drivers in Windows 8
Are you having trouble connecting to your wireless network, or constantly dropping connections? One thing to troubleshoot is removing and reinstalling the drivers for the wireless adapter. This article will show you how to perform the steps in Windows 8.
That process will reset the adapter and the software and many times will fix issues with intermittent disconnect or no connection at all. If you are still having issues after this procedure, then there is some other cause for the problem.
- To start, hold the Windows Key and the X key down at the same time. A new window will pop up in the lower left hand corner.
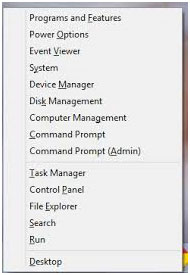
- Choose Device Manager, which will open a new window.
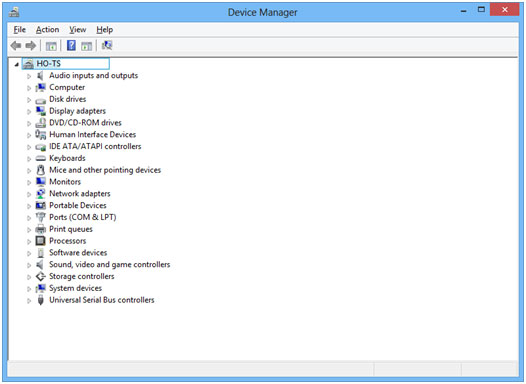
- Click on the arrow next to Network Adapters, and find the Wireless Adapters.
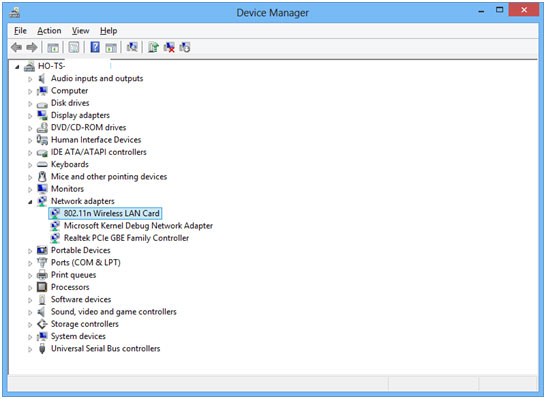
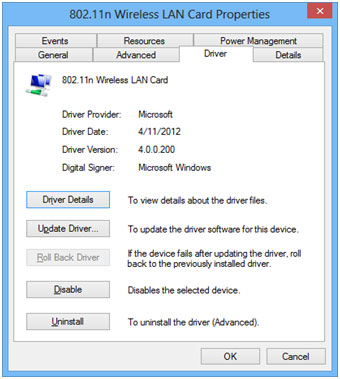
- Next double click on the Wireless Adapter, it will open a new window.
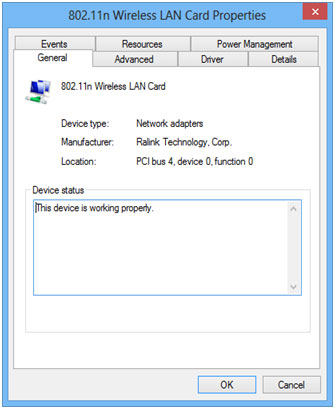
- Next choose the Driver Tab and click on uninstall.
- Once you choose uninstall you will get a confirmation window that pops up.
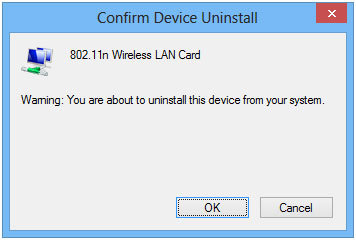
On some devices below the warning text you may get a box that is unchecked that says delete driver software. Make sure you leave that box unchecked. - Once you have chosen OK to uninstall, your device will be uninstalled. The final step will be to restart your computer. The device will redetect on reboot.
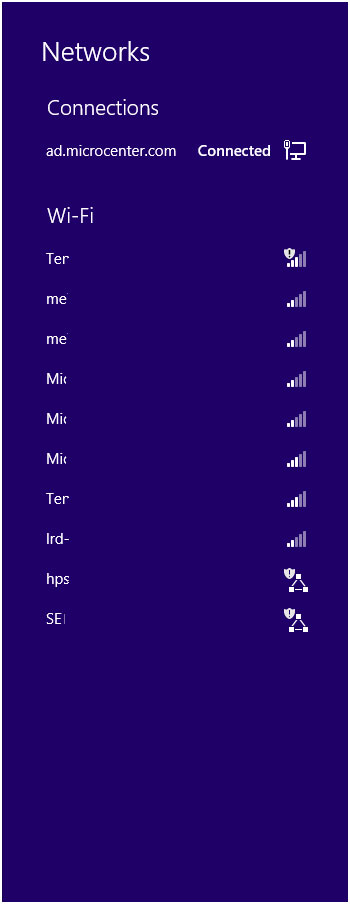
- Finally you will need to reconnect to your wireless network by double clicking on the wireless connection. A new window will open from the right hand side of the screen. You will choose your network and reconnect.
source: www.microcenter.com
Categories
- Acer Software
- Anti-Spyware
- Antivirus Programs
- ASUS Software
- Browsers
- Business Software
- CD Burners
- Cloud Storage
- Communication Tools
- Compression Tools
- Desktop Customization
- Desktop Enhancements
- Developer Tools
- Digital Photo Software
- Driver
- Encryption Software
- Games
- HP Software
- Intel Software
- Interface Tool
- Internet Security Software Suites
- Internet Software
- Keyboard Drivers
- Lenovo Software
- MP3 & Audio Software
- Networking Software
- News
- Operating Systems & Updates
- Other Browser Add-ons & Plugins
- P2P & File-Sharing Software
- Productivity Software
- Security Software
- SEO Tools
- Text Editing Software
- Uncategorized
- Uninstall Backup Software
- Uninstall Download Software
- Uninstall e-book management software
- Uninstall FTP Software
- Uninstall Graphics Software
- Uninstall Monitoring Software
- Uninstall Office Suite Software
- Uninstall PDF Software
- Uninstall Player
- Uninstall Security Software
- Uninstall Utilities
- Utilities & Operating Systems
- Video Editing
- Video Players
- Video Software
- VNC Software
- Web Browsers
- Windows Tutorial
Archives
- June 2021
- April 2021
- March 2021
- February 2021
- January 2021
- December 2020
- November 2020
- October 2020
- September 2020
- August 2020
- July 2020
- June 2020
- May 2020
- April 2020
- March 2020
- February 2020
- January 2020
- December 2019
- November 2019
- August 2019
- July 2019
- June 2019
- May 2019
- April 2019
- March 2019
- February 2019
- January 2019
- December 2018
- November 2018
- October 2018
- September 2018
- August 2018
- July 2018
- June 2018
- May 2018
- April 2018
- March 2018
- February 2018
- January 2018
- December 2017
- November 2017
- October 2017
- September 2017
Comments
Leave a reply