-
How to Quickly Uninstall PowerISO on Windows
- Jun 21,2019
- Compression Tools
-
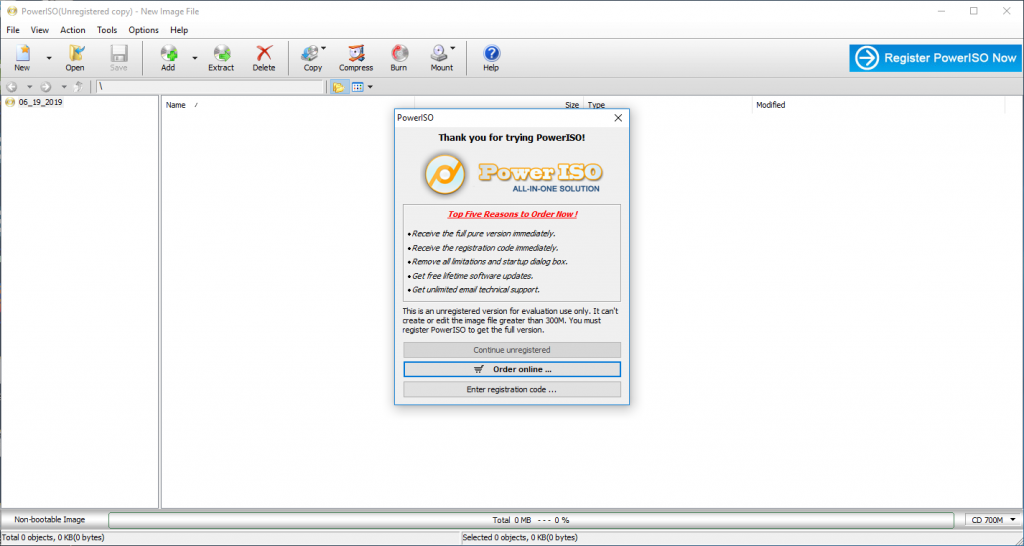
Run into troubles when uninstalling PowerISO? What is the correct method to get it uninstalled without any trace left? In the following we summarize some problems frequently asked by Windows user who desire to get rid of PowerISO completely.
- PowerISO does not appear in the list of installed programs on the Windows system
- The uninstallation of PowerISO is interrupted by error message or unknown reason
- PowerISO-associated files and folders are hard to find out or remove from the PC
What issue you encounter during the uninstall of PowerISO? In this post we will show you two ways of uninstalling PowerISO on a Windows PC. You can either utilize a dedicated removal tool to get rid of any unwanted program without pain, or follow the steps in second method to uninstall PowerISO and remove its components one by one.
Method 1: Run Dedicated Tool to Easily Uninstall PowerISO
There are many uninstall software in the market of Windows PC, but which one is worthy to pay for? Bloatware Uninstaller, known as a professional removal utility designed for Windows system, is capable of uninstalling unwanted software and deleting leftovers. You can watch this clip to know how it works to remove programs:
1. Select target program
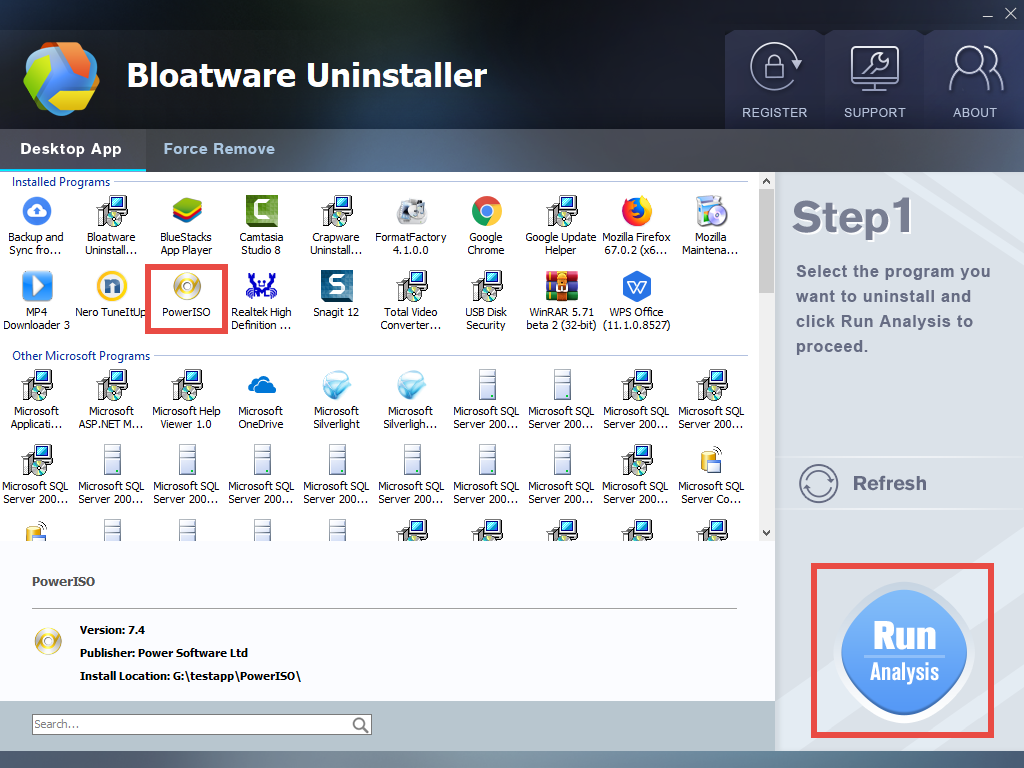
- Double click to run Bloatware Uninstaller after the registration
- Select PowerISO in the list and then click Run Analysis to proceed
2. Scan for program files
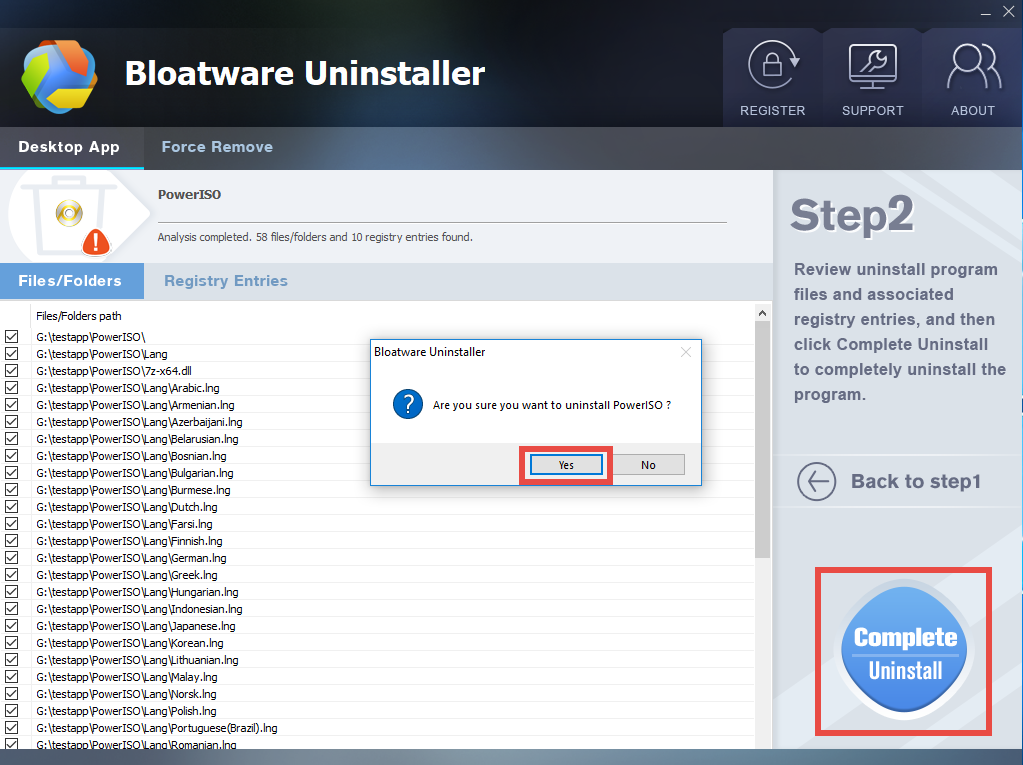
- After the scanning is done, click Complete Uninstall to activate default uninstaller
- Click Yes in pop-up window and follow the prompts to complete uninstallation
- Click Scan Leftovers to start searching PowerISO leftovers around the system
3. Perform final uninstall
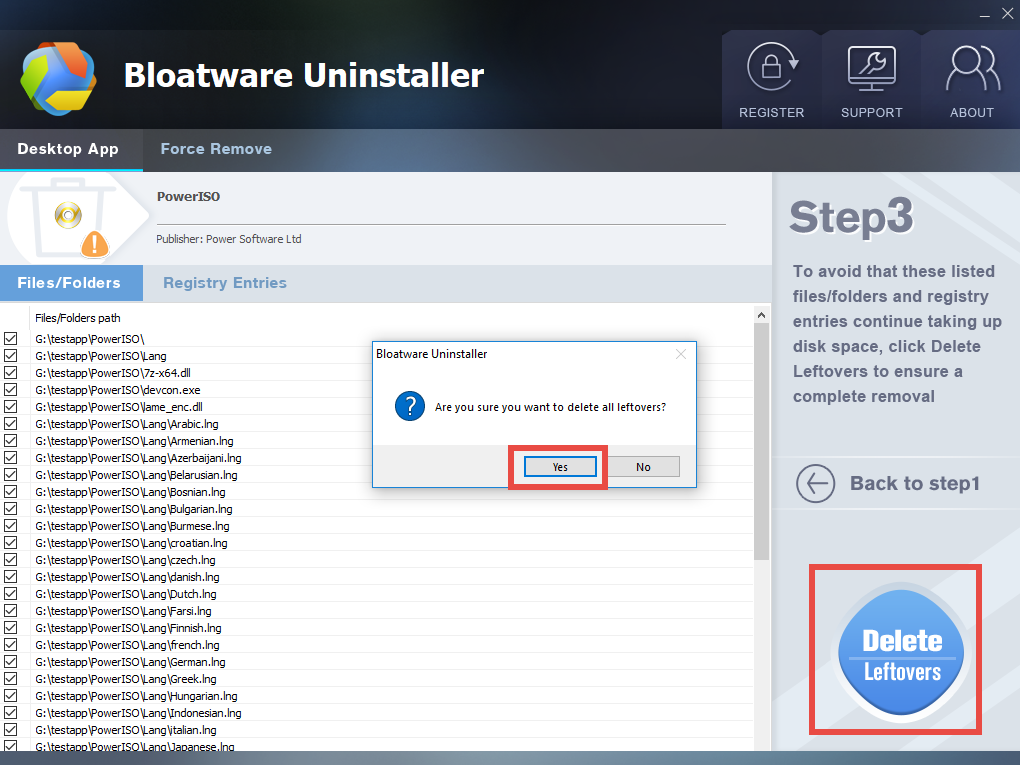
- Keep every box ticked and click Delete Leftover to start thorough removal
- Click Yes in the dialogue box to permanently delete all PowerISO leftovers
To be brief, Bloatware Uninstaller can help you get rid of all traces created by the target program, and the whole procedure can be finished automatically. You only need to guide the tool to do the job and give your confirmation before it starts to work.

Visit the homepage of this site to get more info if you want to try out this app helper.
Method 2: Uninstall PowerISO & Remove PowerISO Leftovers
Don’t want to make the subscription? You can still remove PowerISO step by step. Now follow the instructions below to uninstall PowerISO effectively on Windows.
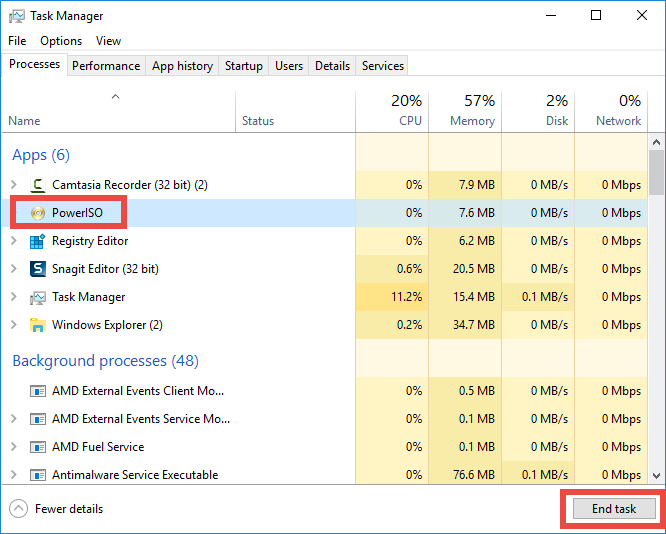
Step 1. Terminate associated processes
Before uninstalling any software you are supposed to shut it down and terminate associated background processes. Otherwise, error message may arise to interrupt normal uninstallation, and the program components that are in use will not be deleted.
- Right click the taskbar and select Task Manager option
- Select associated background processes in Processes tab
- Click End Task to terminated them one by one
Step 2: Uninstall PowerISO from Start menu
- Windows 7:
Hit the Windows key on the keyboard (or click Start icon) and choose Control Panel
Click the Uninstall a program link under the Programs heading
Scroll through to locate Acer Portal, and click on Uninstall/Change link above
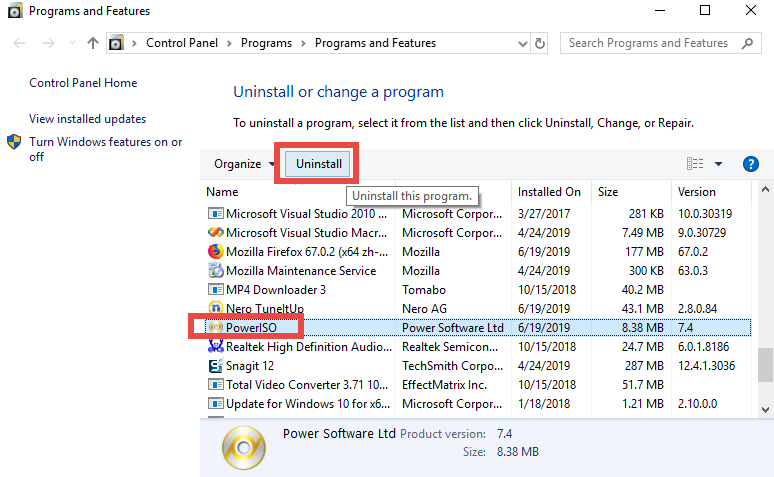
- Windows 8:
Right click on the Start menu and then choose Programs and Features in the list
Highlight PowerISO in the list, and click on the Uninstall/Change link

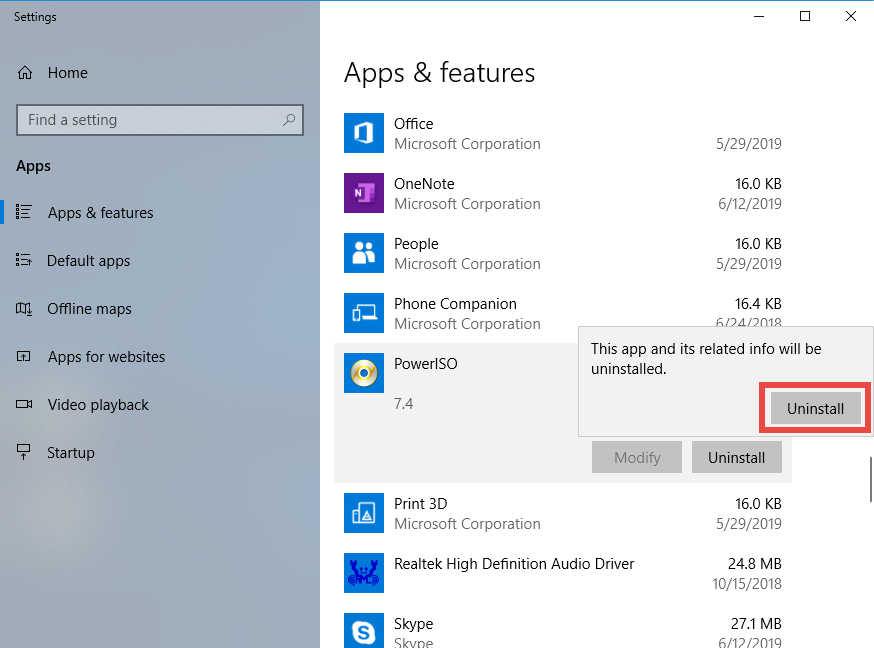
- Windows 10:
Right click on the Start menu and choose App and Features on the top
On the right pane, scroll down to locate PowerISO, and click the entry
Click the Uninstall button that appears below, and click Uninstall again
As the PowerISO Uninstaller window pops up, click Uninstall button, and PowerISO will be deleted in a few seconds. If the wizard does not show up, the program could be corrupted, or the uninstall script is missing. In that case, you can try to install the program again to cover the damaged files, and then uninstall it again by the same way.
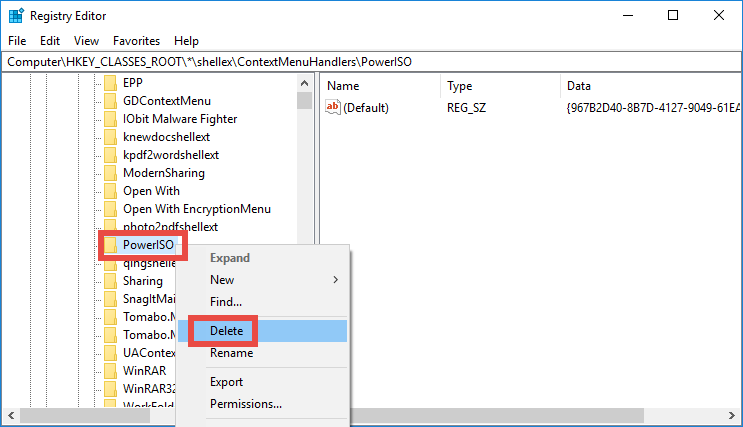
Step 3: Delete invalid entries in Registry
- (Right) click Start and then click Run to launch Run dialog box
- Type “regedit” in the Open: box and press Enter to activate Registry Editor
- If you are prompted by UAC for confirmation, click Yes
- Click Find on the Edit menu in the Registry Editor
- Type the keyword(s) of PowerISO or its vendor in the search box
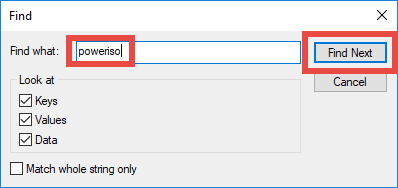
- Click Find Next (and then hit F3) to locate and delete associated keys/values
Warning: don’t make any modification on Registry before backing up the whole database. If you mistakenly delete something in it, you can still reverse the change.
Now we come to the end of this tutorial.What is your opinion about this post?
Categories
- Acer Software
- Anti-Spyware
- Antivirus Programs
- ASUS Software
- Browsers
- Business Software
- CD Burners
- Cloud Storage
- Communication Tools
- Compression Tools
- Desktop Customization
- Desktop Enhancements
- Developer Tools
- Digital Photo Software
- Driver
- Encryption Software
- Games
- HP Software
- Intel Software
- Interface Tool
- Internet Security Software Suites
- Internet Software
- Keyboard Drivers
- Lenovo Software
- MP3 & Audio Software
- Networking Software
- News
- Operating Systems & Updates
- Other Browser Add-ons & Plugins
- P2P & File-Sharing Software
- Productivity Software
- Security Software
- SEO Tools
- Text Editing Software
- Uncategorized
- Uninstall Backup Software
- Uninstall Download Software
- Uninstall e-book management software
- Uninstall FTP Software
- Uninstall Graphics Software
- Uninstall Monitoring Software
- Uninstall Office Suite Software
- Uninstall PDF Software
- Uninstall Player
- Uninstall Security Software
- Uninstall Utilities
- Utilities & Operating Systems
- Video Editing
- Video Players
- Video Software
- VNC Software
- Web Browsers
- Windows Tutorial
Archives
- June 2021
- April 2021
- March 2021
- February 2021
- January 2021
- December 2020
- November 2020
- October 2020
- September 2020
- August 2020
- July 2020
- June 2020
- May 2020
- April 2020
- March 2020
- February 2020
- January 2020
- December 2019
- November 2019
- August 2019
- July 2019
- June 2019
- May 2019
- April 2019
- March 2019
- February 2019
- January 2019
- December 2018
- November 2018
- October 2018
- September 2018
- August 2018
- July 2018
- June 2018
- May 2018
- April 2018
- March 2018
- February 2018
- January 2018
- December 2017
- November 2017
- October 2017
- September 2017
Comments
Leave a reply