-
How can We Remove Skype from the Computer Effectively
- Nov 08,2017
- Communication Tools
-

Coming across some issues to remove Skype on your own computer? You will feel lucky to find this post which are all about showing you how to uninstall the program properly.
Skype is a well-known communication tool that allows people to stay in touch with family and friends, there are several versions available for different people, such as the free version, business verion and the paid version. The Skype users should get a personal account to log in before starting useing this application.
Usually, some people would need to uninstall Skype for some reasons, like having a technical problems with the program itself, should reinstall the program on PC, or just don’t need to use it anymore on the device. However, this program removal is not as smooth as people expect. Problems like cannot find the program under Windows’ uninstaller, or unable to totally remove it from the computer frequently happen on the computer. So maybe it is necessary for you now to learn a some proper way to remove Skype completely from your computer.
Hwo to get Skype off the Windows computer, there is not only one standard approach for the program uninstallation, the following guides are all the available ways can help you uninstall Skype, but I still would like to recommend you use the eaisest and most effective way to remove the program.
Optional ways to remove Skype app from Windows
1 – Uninstall Skype with its own removing process
Skype gets a built-in uninstall process, which can be accessed via the Windows start menu, but the manual removal should take some time to finish the whole remvoal on teh computer.
- Directly click on the Windows button, select All Programs
- Find Skype on the list, and right-click on it
- Select Uninstall on the sub-menu
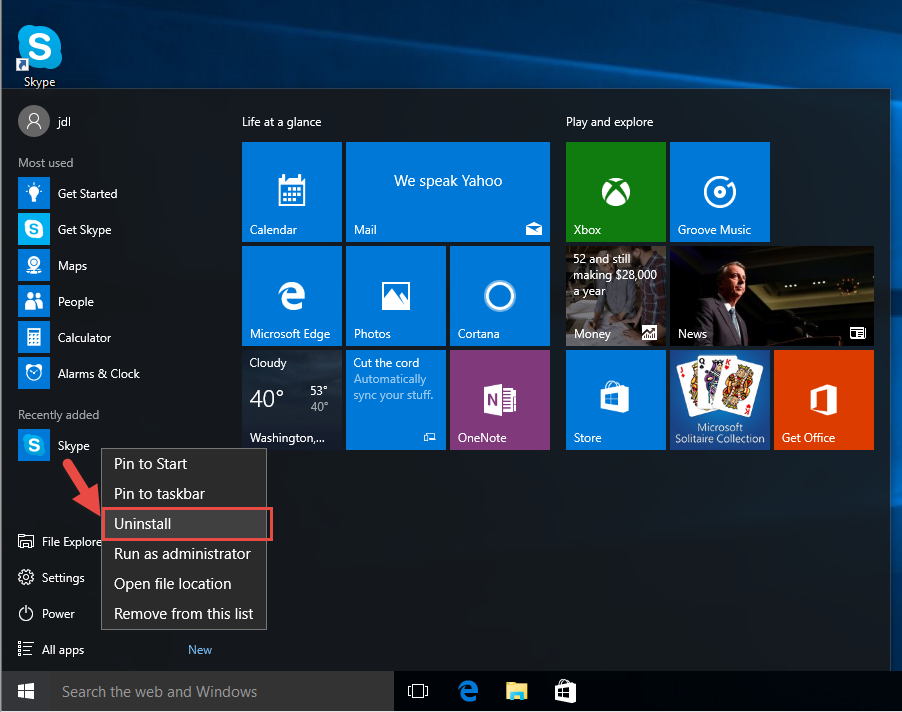
- And then you will be redirected to the removing wizard
- Follow the uninstall wizard to remove Skype
- Click Yes to make sure you want to uninstall Skype
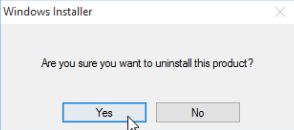
- Wait until the removing process finish, and go to restart your computer.
- After loggin into the computer again, go to check the installed folder and make sure is has been deleted
- After then, click the Windows icon again to open the menu, and type “regedit”
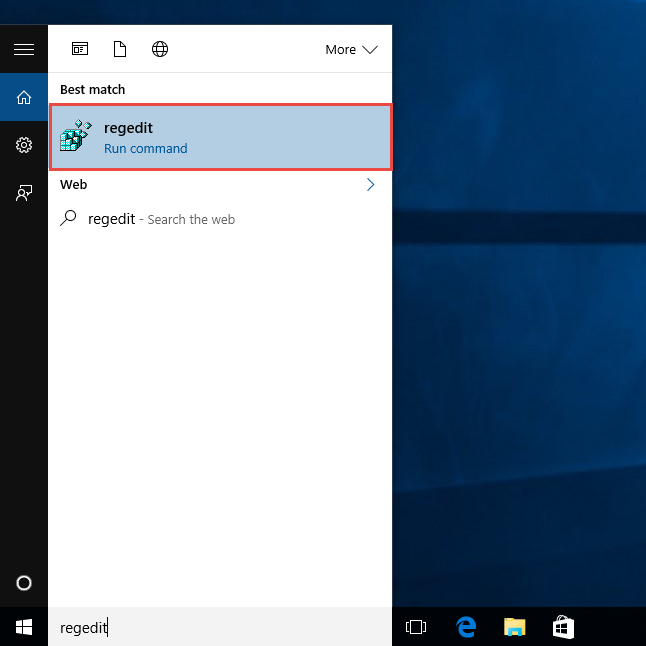
- Click regedit on the search result to open the Registry Editor on the computer’s system
- Unwrap the registry group on the left pane, and delete any registry key related to the Skype product
- If you are not sure which registry key is the right one and worry about a manual error, it is suggested to export the key for backup before you delete it.
2 – Apply Windows uninstall utility
- Open the Windows menu via right-clicking on the small Windows icon
- Click on the first item “Programs and Features”
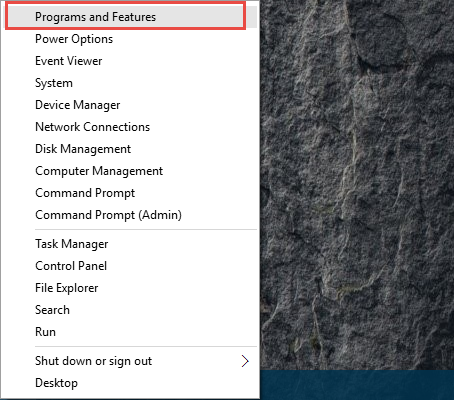
- Find and higlight the Skype application on the list; if you cannot find the program’s name on the panel, I am afraid that you might not be able to remove the program in this way and try the following method)
- Click Uninstall as the following image
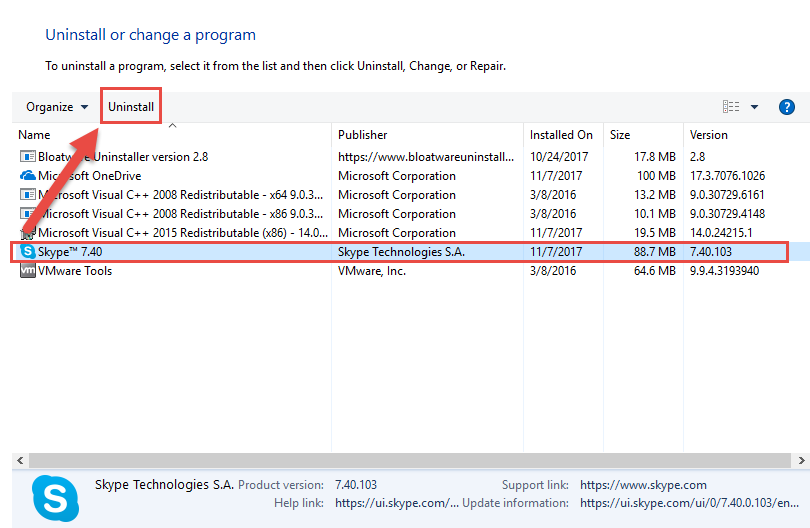
- Perform the program removal with the uninstall instruction
- When finish, go to restart the computer
- Clean the leftovers of Skype app as the above instructions
3 – Remove Skype app with professional uninstaller
Professional uninstaller is able to perform the program removal in an automatic way, and more importantly, the advanced cleaning tool can scan and remove all of the associated files on the computer, so people don’t need to take the annoying steps in order to totally get rid of the program on PC. You can get Bloatware Uninstaller as a good one to remove Skype for you:
- Download and install Bloatware Uninstaller on the PC, and open it
- Select Skype on the interface, and then click Run Analysis button
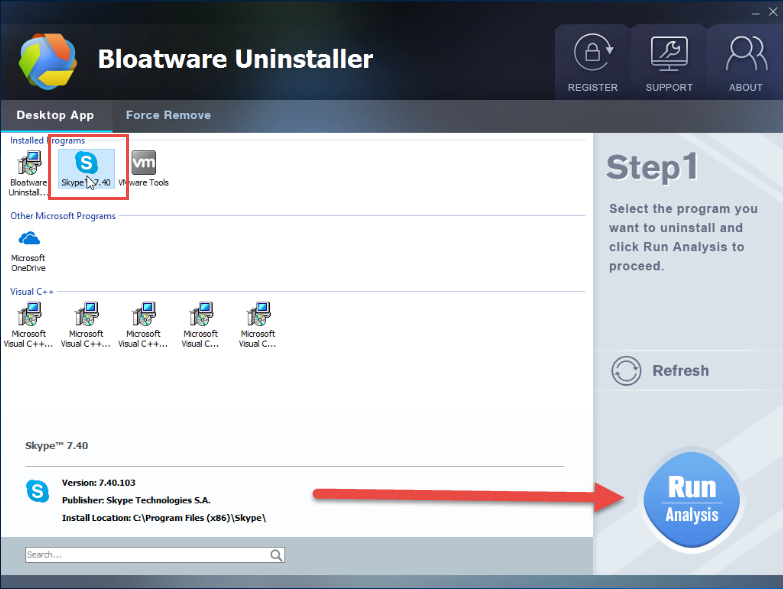
- When all of associated files and modules are scanned, continue to click on Complete Uninstall button
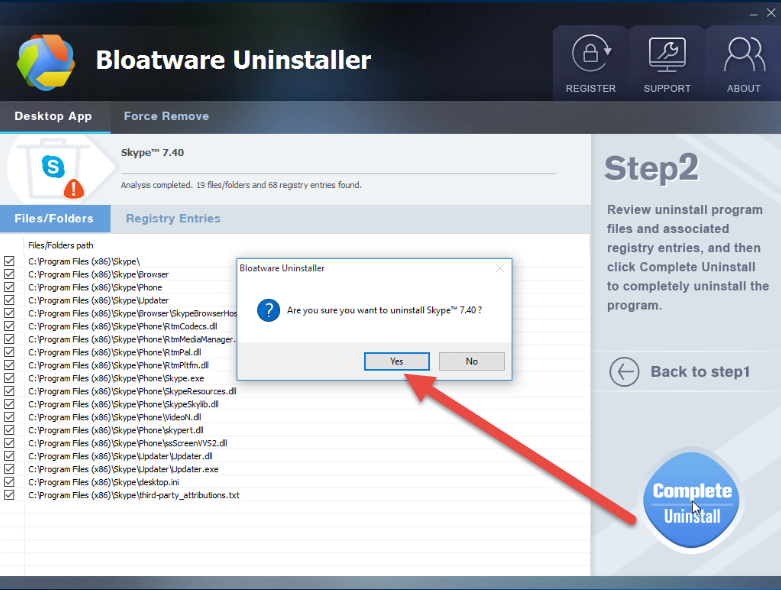
- Click Yes to start the removal, and click Yes again to confirm the removal
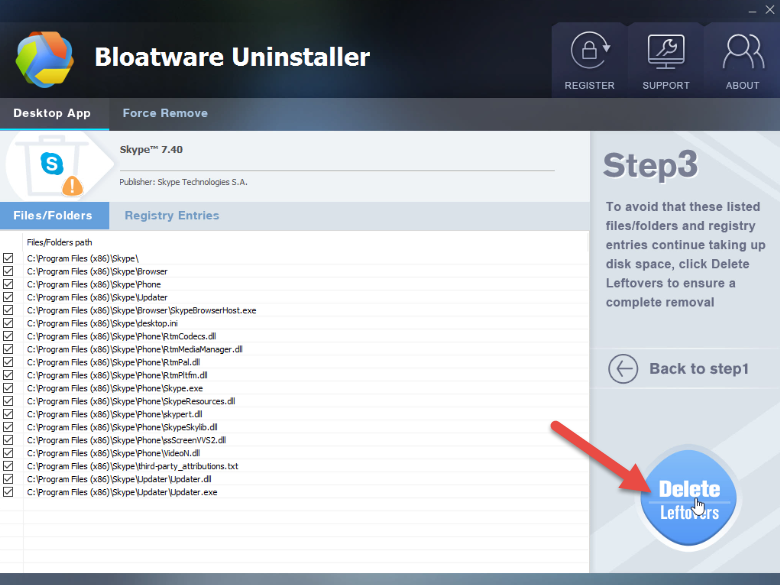
- Click on Scan Leftovers when the removal is completed, you will see all the leftovers of the program will be scanned and listed, and the removal still continues
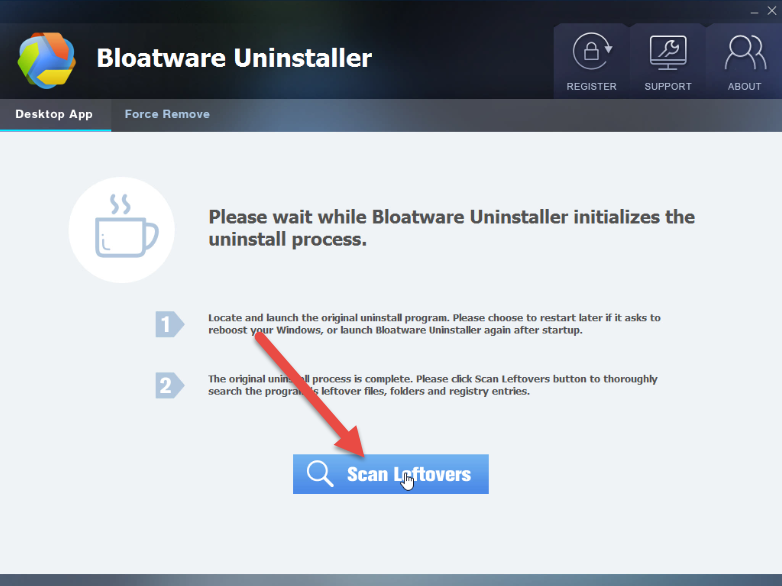
- Click on Delete Leftovers to remove all of these files, and you will finish to uninstall Skype completely on the PC.
Categories
- Acer Software
- Anti-Spyware
- Antivirus Programs
- ASUS Software
- Browsers
- Business Software
- CD Burners
- Cloud Storage
- Communication Tools
- Compression Tools
- Desktop Customization
- Desktop Enhancements
- Developer Tools
- Digital Photo Software
- Driver
- Encryption Software
- Games
- HP Software
- Intel Software
- Interface Tool
- Internet Security Software Suites
- Internet Software
- Keyboard Drivers
- Lenovo Software
- MP3 & Audio Software
- Networking Software
- News
- Operating Systems & Updates
- Other Browser Add-ons & Plugins
- P2P & File-Sharing Software
- Productivity Software
- Security Software
- SEO Tools
- Text Editing Software
- Uncategorized
- Uninstall Backup Software
- Uninstall Download Software
- Uninstall e-book management software
- Uninstall FTP Software
- Uninstall Graphics Software
- Uninstall Monitoring Software
- Uninstall Office Suite Software
- Uninstall PDF Software
- Uninstall Player
- Uninstall Security Software
- Uninstall Utilities
- Utilities & Operating Systems
- Video Editing
- Video Players
- Video Software
- VNC Software
- Web Browsers
- Windows Tutorial
Archives
- June 2021
- April 2021
- March 2021
- February 2021
- January 2021
- December 2020
- November 2020
- October 2020
- September 2020
- August 2020
- July 2020
- June 2020
- May 2020
- April 2020
- March 2020
- February 2020
- January 2020
- December 2019
- November 2019
- August 2019
- July 2019
- June 2019
- May 2019
- April 2019
- March 2019
- February 2019
- January 2019
- December 2018
- November 2018
- October 2018
- September 2018
- August 2018
- July 2018
- June 2018
- May 2018
- April 2018
- March 2018
- February 2018
- January 2018
- December 2017
- November 2017
- October 2017
- September 2017


Comments
Leave a reply