-
How to Properly Uninstall Lenovo Warranty Information
- Mar 29,2019
- Lenovo Software
-

Just got a new Lenovo computer? Have you noticed the pre-installed Lenovo software in your new device? Some users don’t want to keep any bloatware on their PCs and decide to remove some useless programs to spare some disk space. But which programs can be removed safely and which should be kept on your Lenovo computer?
Your Lenovo computer may contain the software in the following list:
– Lenovo Registration
– Lenovo Simple Tap
– Lenovo User Guide
– Lenovo Warranty Information
– Lenovo Welcome
– Lenovo Message Center Plus
– Lenovo Communications Utility
– Lenovo System Update
– Lenovo Fingerprint Manager Pro
– Lenovo QuickControl
– Lenovo Solution Center
– Lenovo SHAREit
– Lenovo Think Vantage
Lenovo Warranty Information is a program distributed by the manufacturer on its computers. If you don’t need this program, you can use native/third party tools to remove it. Again, only remove the software that are not serve any of your purposes.
How to uninstall Lenovo Warranty Information without hassle? What are the correct steps to remove bloatware on a Windows PC? This removal guide will show you all.
1. Regular steps to uninstall Lenovo Warranty Information:
First of all, go to check if Lenovo Warranty Information is active in your system tray. Some pre-installed software will launch automatically in the background. If necessary, launch Task Manager by pressing the Ctrl + Shift + Esc keyboard shortcut, locate Lenovo Warranty Information in the list of process, and then click End Task button.

After that, you can uninstall Lenovo Warranty Information from the Start menu. Note that the operation could differ depending on the version of Windows system.
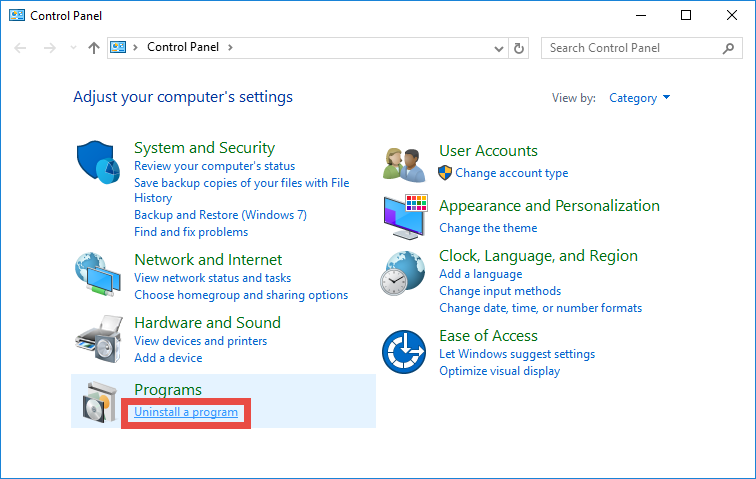
- Windows 7:
Hit the Windows key on the keyboard (or click Start icon) and choose Control Panel
Click the Uninstall a program link under the Programs heading
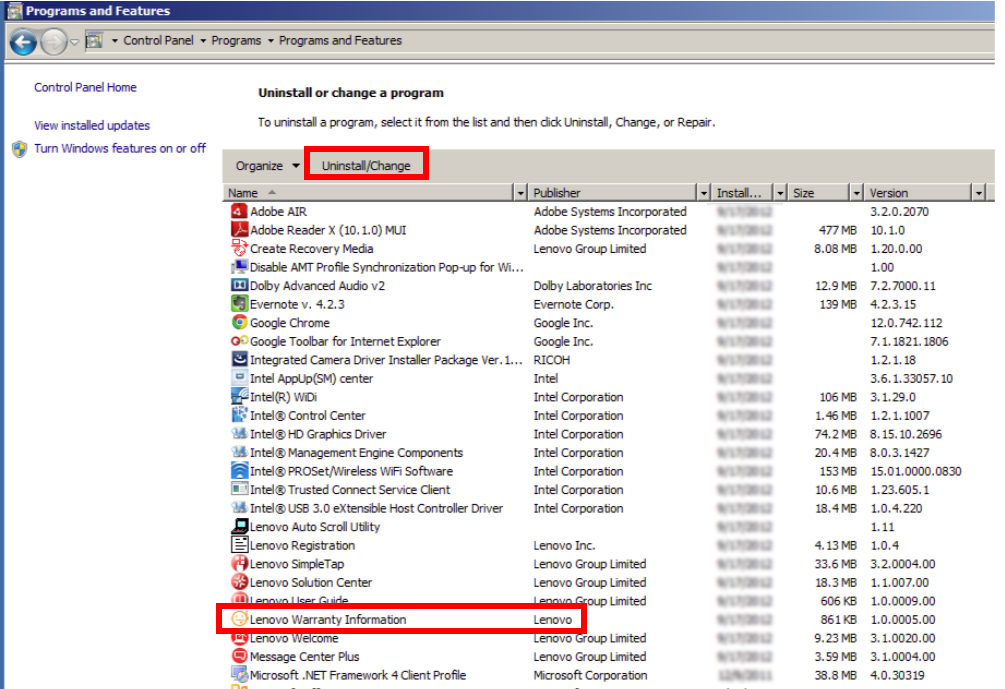
Scroll through to locate Lenovo Warranty Information, and click on Uninstall/Change
- Windows 8:
Right click on the Start menu and then choose Programs and Features in the list
Highlight Lenovo Warranty Information in the list, and click on Uninstall/Change
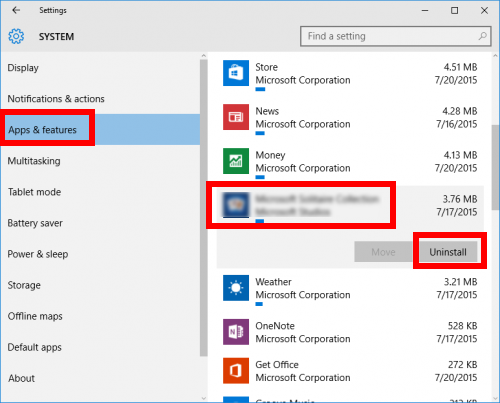
- Windows 10:
Right click on the Start menu and choose App and Features on the top
On the right pane, scroll down to locate Lenovo Warranty Information
Select Lenovo Warranty Information, and click the Uninstall button below
Click the Uninstall button that pops up above to activate the built-in uninstaller
As the Windows Installer pops up, follow onscreen prompts to complete the uninstall. So, is the uninstall complete now? What else can you do to ensure a clean removal?
2. Here is the extra deletion work to do after the uninstall:
Almost all Windows programs will create associated files in the Windows Registry during the first setup and later use. Yet, those associated items will not automatically disappear along with the uninstallation of the programs. To avoid a bloat Registry and keep your PC clean, you can consider to delete the program-related items either manually (may be a little risk-taking), or by using a professional registry cleaner.
Now you can follow the steps below to detect and delete the junk files and folders pertaining to Lenovo Warranty Information (or other Lenovo bloatware) in Registry:
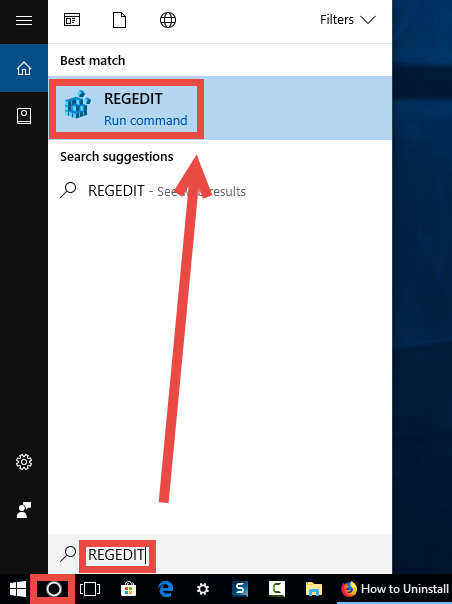
- Click the Search icon, type in REGEDIT, and click the Regedit in the result
- Click Yes if you are prompted to give confirmation in the UAC dialog
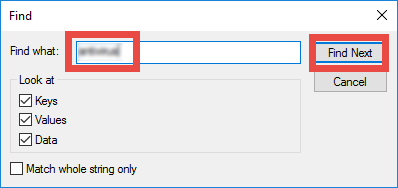
- Click the Edit menu and then choose Find option (or press Ctrl + F keys)
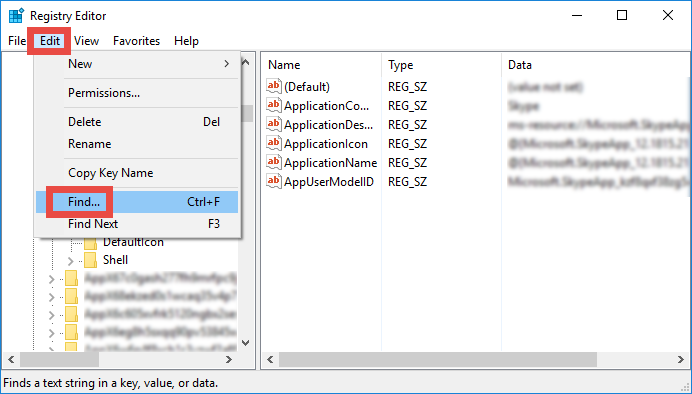
- Type Lenovo Warranty Information in the Find box, and click Find Next button
- Once the matched entries are found, check if they are pertaining to Lenovo Warranty Information. If so, right click on the key or value and choose Delete option
- Hit F3 button to locate the next one, and repeat the steps to delete related entries
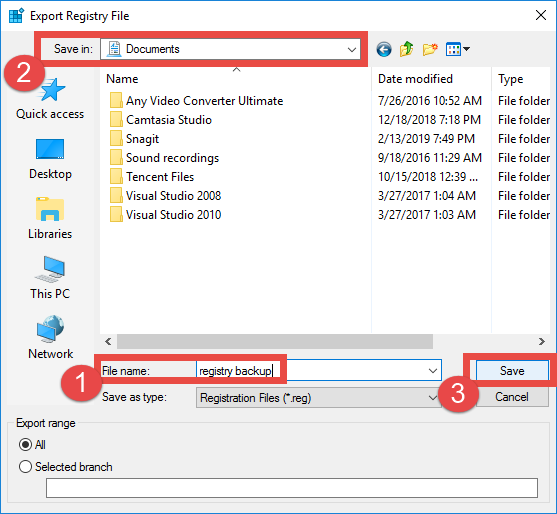
Note: inexperienced users are not encouraged to modify Registry, and make sure to back up the whole registry before making changes on it. How to do the backup:
- In the Registry Editor, click to select Computer on the left pane
- Click the File menu at the top and choose Export option
- Type a name for the backup file in the Export Registry File window
Choose All under Export section, select a location, and click Save button
3. Run a dedicated tool to remove Lenovo Warranty Information:
Is it possible to uninstall a bunch of Lenovo bloatware within several clicks? How to achieve the goal? A tool named Bloatware Uninstaller is the answer to this question.
We take Lenovo Warranty Information as an example to show you how to do with it:
- Download Bloatware Uninstaller in this site, and launch it after the installation
- Click Lenovo Warranty Information in the Desktop App tab, and click Run Analysis
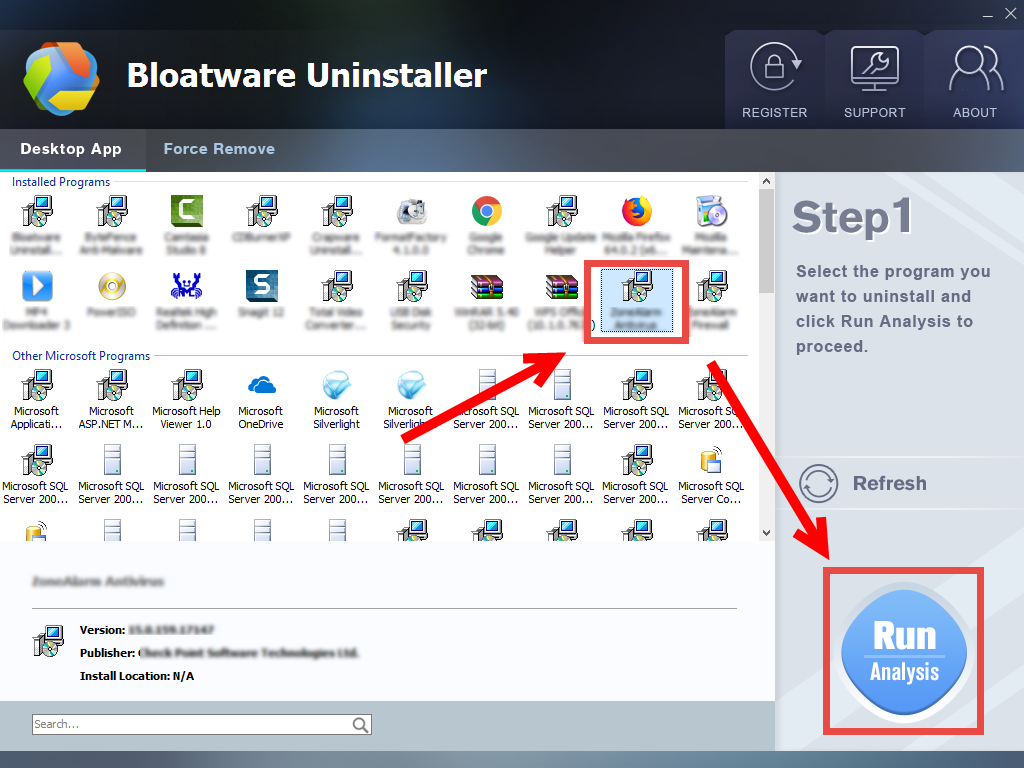
- Click Complete Uninstall button, and click Yes button in the pop-up window

- Follow prompts to remove Lenovo Warranty Information, and click Scan Leftovers
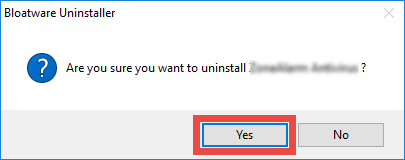
- Click Delete Leftovers button, and then click Yes button in the pop-up window
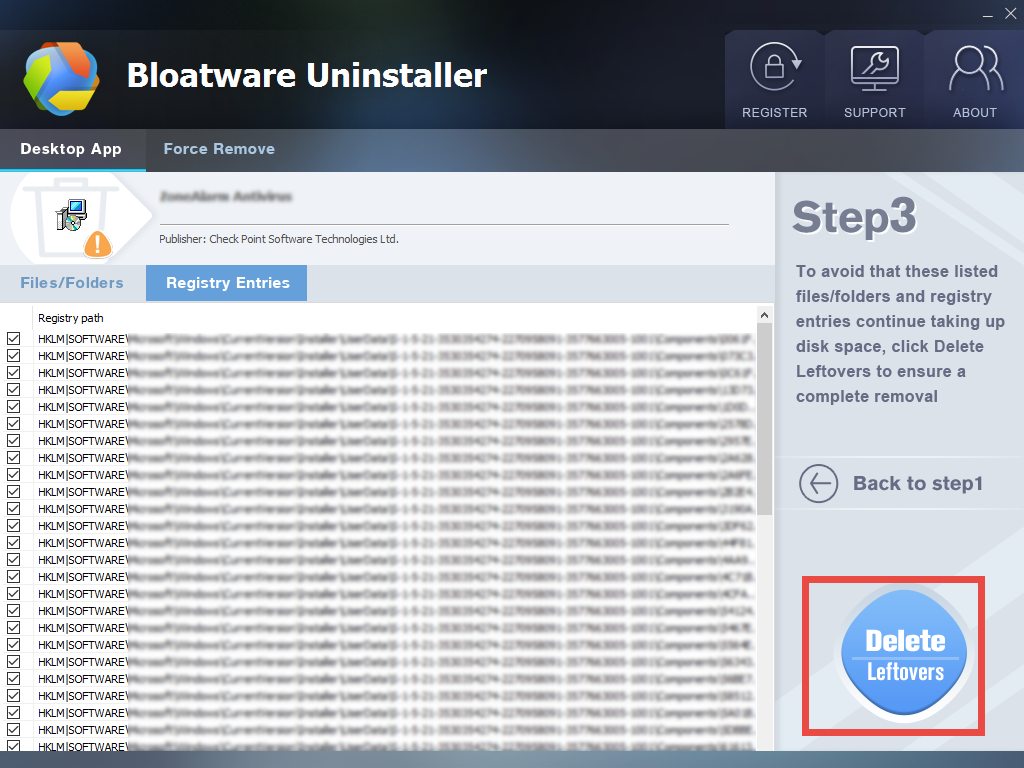
- Click OK when prompted that all leftovers have been completely removed
After that, click Back to Step 1 button to re-scan the system, and repeat the steps above to continue the removal of other unwanted Lenovo programs from Windows.
- Windows 7:
Categories
- Acer Software
- Anti-Spyware
- Antivirus Programs
- ASUS Software
- Browsers
- Business Software
- CD Burners
- Cloud Storage
- Communication Tools
- Compression Tools
- Desktop Customization
- Desktop Enhancements
- Developer Tools
- Digital Photo Software
- Driver
- Encryption Software
- Games
- HP Software
- Intel Software
- Interface Tool
- Internet Security Software Suites
- Internet Software
- Keyboard Drivers
- Lenovo Software
- MP3 & Audio Software
- Networking Software
- News
- Operating Systems & Updates
- Other Browser Add-ons & Plugins
- P2P & File-Sharing Software
- Productivity Software
- Security Software
- SEO Tools
- Text Editing Software
- Uncategorized
- Uninstall Backup Software
- Uninstall Download Software
- Uninstall e-book management software
- Uninstall FTP Software
- Uninstall Graphics Software
- Uninstall Monitoring Software
- Uninstall Office Suite Software
- Uninstall PDF Software
- Uninstall Player
- Uninstall Security Software
- Uninstall Utilities
- Utilities & Operating Systems
- Video Editing
- Video Players
- Video Software
- VNC Software
- Web Browsers
- Windows Tutorial
Archives
- June 2021
- April 2021
- March 2021
- February 2021
- January 2021
- December 2020
- November 2020
- October 2020
- September 2020
- August 2020
- July 2020
- June 2020
- May 2020
- April 2020
- March 2020
- February 2020
- January 2020
- December 2019
- November 2019
- August 2019
- July 2019
- June 2019
- May 2019
- April 2019
- March 2019
- February 2019
- January 2019
- December 2018
- November 2018
- October 2018
- September 2018
- August 2018
- July 2018
- June 2018
- May 2018
- April 2018
- March 2018
- February 2018
- January 2018
- December 2017
- November 2017
- October 2017
- September 2017
Comments
Leave a reply