-
How to Uninstall TestDisk from Windows Computer?
- Dec 31,2020
- Uninstall Utilities
-
Guide to Uninstall TestDisk on Windows-based computer from start to finish. You will get how to get rid of TestDisk and all its components, hidden files, even related registry entries left in system.
You will also get how to uninstall TestDisk utilizing a much easier and faster way. This guide is right for all people since we have all had problems uninstalling windows programs. If you delete or remove a Windows program, do not worry wit this guide you can clean out all remnants that you considered left.
Tips: Click the Download button below to obtain a professional removal tool.

TestDisk Overview
TestDisk is a data recovery program made for Windows users recovering all partitions that they considered lost. It also can be used to enable your non-booting disks be bootable if it ever encountered some issues caused by malware, mistaken deletion of partition table, and more. By using TestDisk, you not merely can save your partition table, recover lost partition, rebuild boot sector, and fix FAT tables, but also can get all your deleted files come back without efforts. If you are not familiar with data recovery and looking for to restore your deleted partitions and files, TestDisk will deliver a lot of help. And it is available for all Windows-based computers, Linux, Mac OS X and more.
Looking for to Uninstall TestDisk on Windows?
If you are suffering some issues with the newest version of TestDisk, for example, it totally locked up, then we recommend you uninstall TestDisk and reinstall an older version to troubleshoot. And we will show you how to completely get rid of TestDisk and all remnants from a Windows computer. Continue reading to figure it out.
Uninstall TestDisk Through Windows Built-in Uninstaller
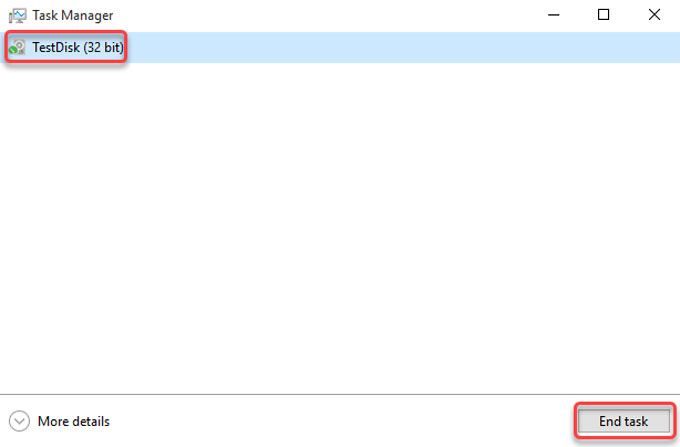
Step 1: Before starting to uninstall TestDisk, make sure the program is completely quit and all associated with files have been closed. Right-click the Start Menu > click Task Manager > click TestDisk > click End task.
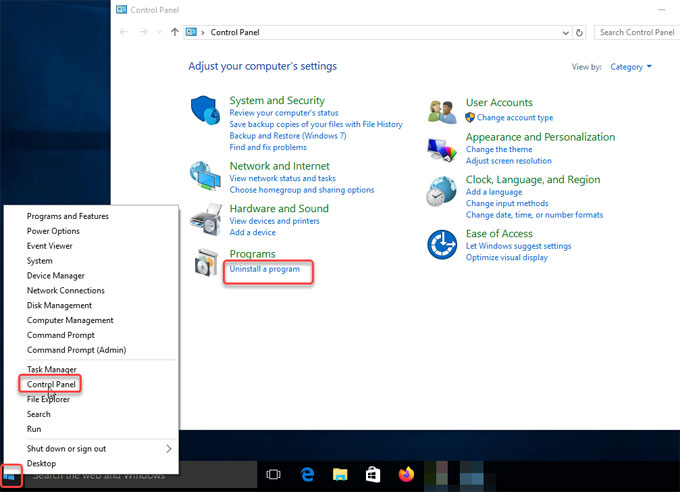
Step 2: Click or right-click the Start menu > click Control Panel and open Uninstall a program there.
Step 3: In the Uninstall or change a program window, scroll up and down to locate at the TestDisk program > click or right-click the TestDisk program > select Uninstall option.
Step 4: To succeed in a complete removal, you also need to clean out all remnants like the left files, folders, entries and more, you need to do it in Registry Editor. Right-click Start menu > click Run > enter regedit in the Open box > press Enter key.

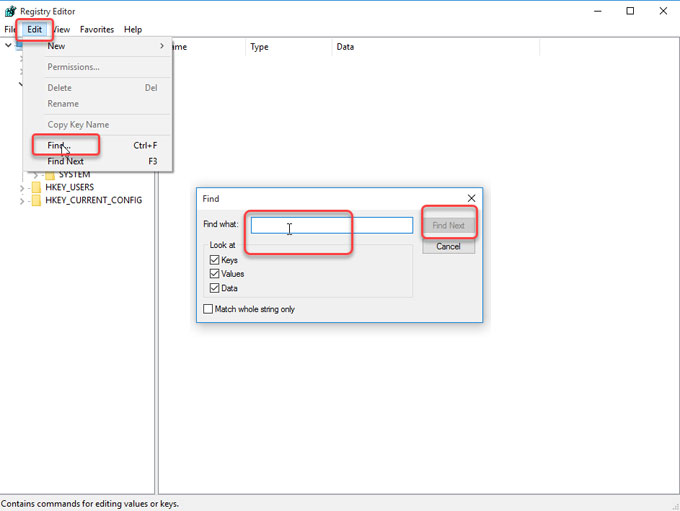
Step 5: In the Registry Editor window, click Edit > click Find > type in the TestDisk pathname in the Find what box > click Find Next. Access to the following keys, delete files associated with the TestDisk program.
- HKEY_CURRENT_USER\Software
- HKEY_LOCAL_MACHINE\SOFTWARE
- HKEY_USERS\.DEFAULT\Software
Step 6: Restart your PC.
Uninstall TestDisk Through Bloatware Uninstaller
Are you confused by your unwanted programs? Do you not know what to do with removing TestDisk? Do you still not know how to clean out leftovers after TestDisk is removed? Do you want to succeed in removing any unwanted Windows programs effortlessly? The second method can help you.
We will use a professional uninstaller software to help you uninstall TestDisk and other undesired programs from Windows through a few of clicks. Now, let’s see how it works.
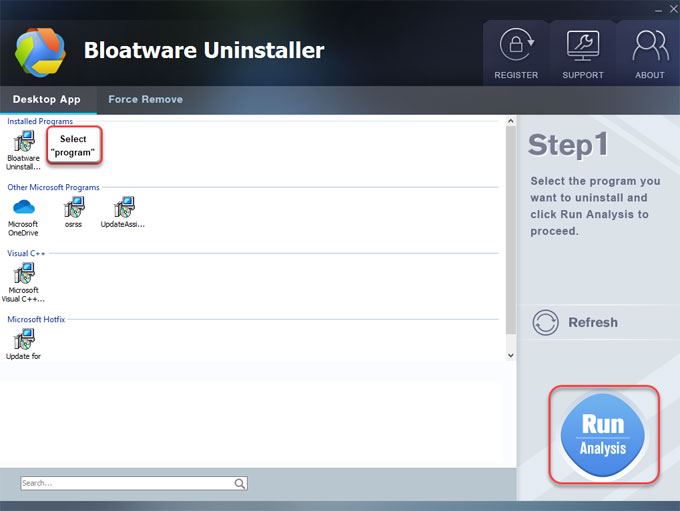
Step 1: Download, install, and activate Bloatware Uninstaller (you can download it at the beginning or end of the post) on your computer. When Bloatware Uninstaller launches, locate at and select the TestDisk program, click Run Analysis.
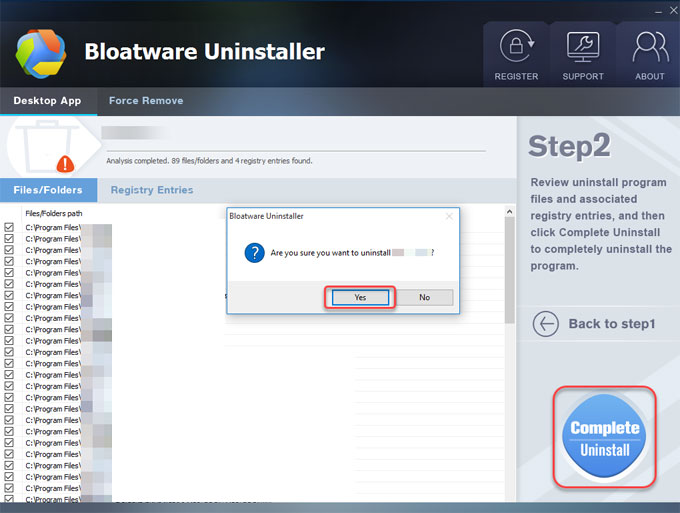
Step 2: Click Complete Uninstall > click Yes to make sure you want to remove TestDisk. Follow the pop-up uninstall wisard to finish the TestDisk removal.
Step 3: Click Scan Leftovers.

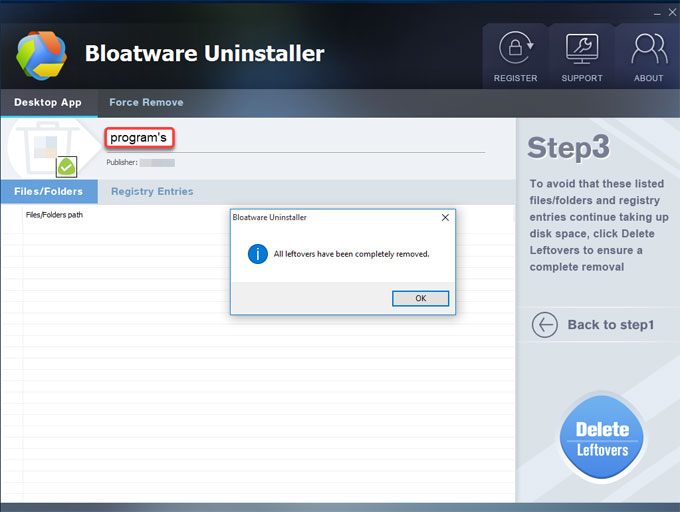
Step 4: Click Delete Leftovers > click Yes to delete all leftover files. All leftovers have been completely removed. click OK.
Step 5: Restart your computer.
Conclusion
I want to help you understand what it takes to uninstall TestDisk and delete all its leftovers from Windows. Choose a method that is right for you, and turn it into an actionable solution to succeed in removing TestDisk. And in this guide, I also show you how a professional uninstaller helps to save much time and power in removing a program. Thus, choose a method you prefer, don’t hesitate to clean out remnants in order to make your PC perform better each day.
Categories
- Acer Software
- Anti-Spyware
- Antivirus Programs
- ASUS Software
- Browsers
- Business Software
- CD Burners
- Cloud Storage
- Communication Tools
- Compression Tools
- Desktop Customization
- Desktop Enhancements
- Developer Tools
- Digital Photo Software
- Driver
- Encryption Software
- Games
- HP Software
- Intel Software
- Interface Tool
- Internet Security Software Suites
- Internet Software
- Keyboard Drivers
- Lenovo Software
- MP3 & Audio Software
- Networking Software
- News
- Operating Systems & Updates
- Other Browser Add-ons & Plugins
- P2P & File-Sharing Software
- Productivity Software
- Security Software
- SEO Tools
- Text Editing Software
- Uncategorized
- Uninstall Backup Software
- Uninstall Download Software
- Uninstall e-book management software
- Uninstall FTP Software
- Uninstall Graphics Software
- Uninstall Monitoring Software
- Uninstall Office Suite Software
- Uninstall PDF Software
- Uninstall Player
- Uninstall Security Software
- Uninstall Utilities
- Utilities & Operating Systems
- Video Editing
- Video Players
- Video Software
- VNC Software
- Web Browsers
- Windows Tutorial
Archives
- June 2021
- April 2021
- March 2021
- February 2021
- January 2021
- December 2020
- November 2020
- October 2020
- September 2020
- August 2020
- July 2020
- June 2020
- May 2020
- April 2020
- March 2020
- February 2020
- January 2020
- December 2019
- November 2019
- August 2019
- July 2019
- June 2019
- May 2019
- April 2019
- March 2019
- February 2019
- January 2019
- December 2018
- November 2018
- October 2018
- September 2018
- August 2018
- July 2018
- June 2018
- May 2018
- April 2018
- March 2018
- February 2018
- January 2018
- December 2017
- November 2017
- October 2017
- September 2017
Comments
Leave a reply