-
How to Uninstall FileZilla Software for Windows PC?
- Apr 02,2020
- Uninstall FTP Software
-
This tutorial offers a comprehensive look into the entire Uninstall FileZilla process – from manual solution using Windows built-in uninstalling tool to technical solution using Bloatware Remover. The guide is ideal for those wondering how to Uninstall FileZilla as a professional, cleaning left files, folders, or entries. The methods instructed here are suitable for individuals of all skills levels. Each step starts with a clear explanation and corresponding screen shots.

FileZilla Overview
FileZilla is a sought-after open-course FTP software that comes in the client version for free and server version, with all FTP program function. The high controllability, organized interface, and simplified solution to manage multiple websites make the FileZilla FTP client a convenient and efficient tool for FTP users.
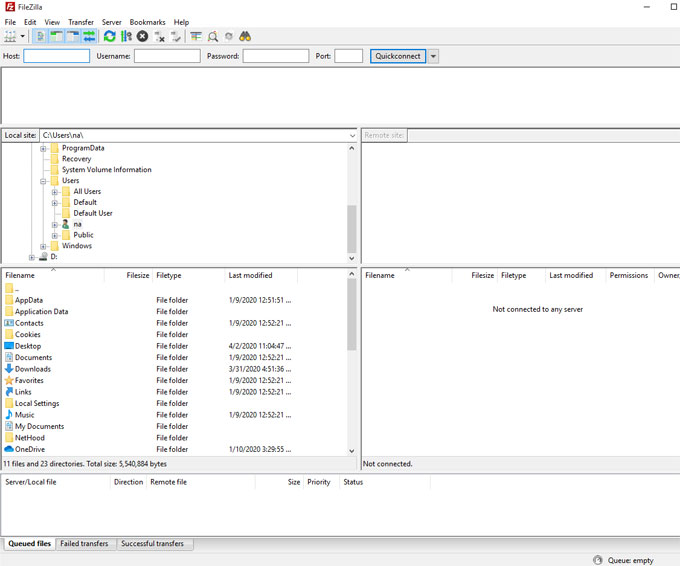
This FileZilla software is specially intended to help users to get a good FTP/SFTP solution for free. FileZilla has been always dedicating in supporting Standard FTP, FTP over TLS, and SFTP files transfer protocol. Many users think FileZilla is very good to use not only because it is free of charge but also the powerful supports of a variety of operating systems, like Windows, Linux and macOS, and the intuitive graphical user interface. In addition, FileZilla offers a multi-language package, there are many languages available. Along with that the support of fast uploading and beak-point uploading also make FileZilla the number one choice.
How to Uninstall FileZilla in Windows PC?
These are two very easy solutions you need to uninstall FileZilla from your computers in Windows. If you are a complete beginner and you know nothing about uninstalling, don’t worry at all! In each step of the FileZilla removal solutions, we start from the very basics and will gradually help you figure out how to uninstall a program. The guide contains some corresponding screen shots that make it easy to understand. Let’s start now.
Solution 1 – Remove FileZilla Through Windows Built-in Uninstaller
Following are the manual sections of how to uninstall FileZilla using the Windows built-in uninstaller. If you are confident in removing a program in person, follow the steps as followed.
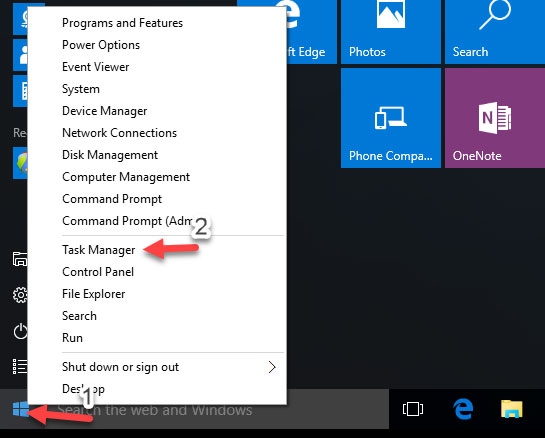
Step 1: To start the FileZilla removal, make sure that the program exits and is not running in the background. Right click Start menu > Select Task Manager.
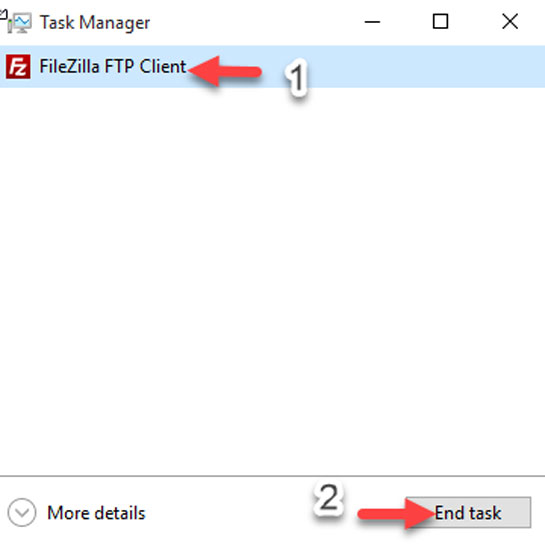
In the Task Manager window> click Process > click FileZilla > click End task/process.
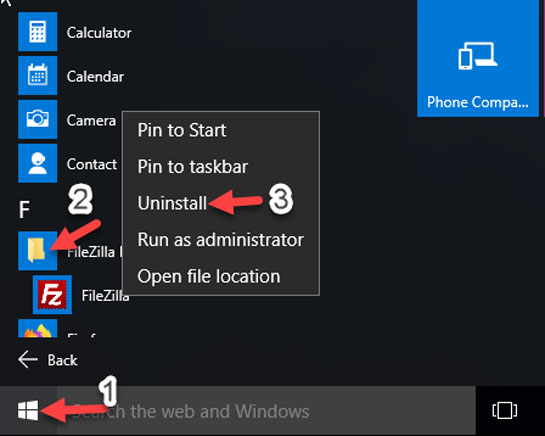
Step 2: Click Start menu > locate at FileZilla > open FileZilla folder > choose Uninstall.
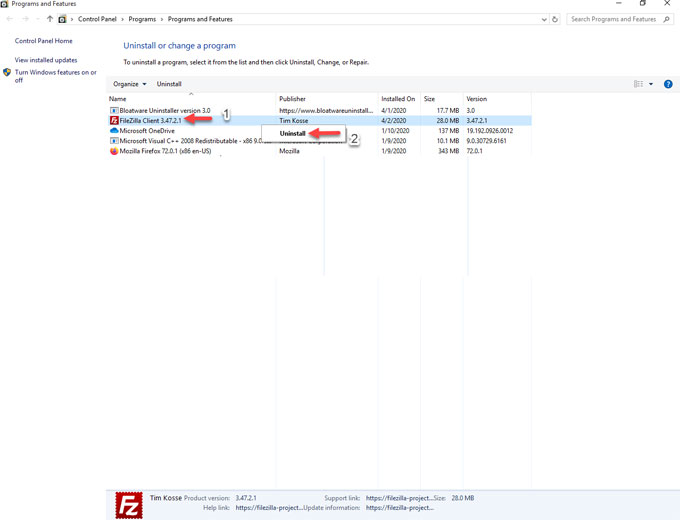
Step 3: In the Programs and Features interface, right click on FileZilla > click Uninstall.
Step 4: The pop-up prompts will guide you to finish the FileZilla removal. Once done, restart your computer.
Solution 2 – Uninstall FileZilla Through Professional Bloatware Uninstaller
If you are not confident in uninstalling FileZilla software manually in person, stop hesitating and try Bloatware Uninstaller, and do what you can do very easily with just a couple of quick clicks of the mouse. I will also show you how to use the professional Bloatware Uninstaller tool to make your FileZilla uninstall a breeze.
Who this uninstaller tool is for:
- Anyone starting out who wishes to understand how to uninstall FileZilla like a pro.
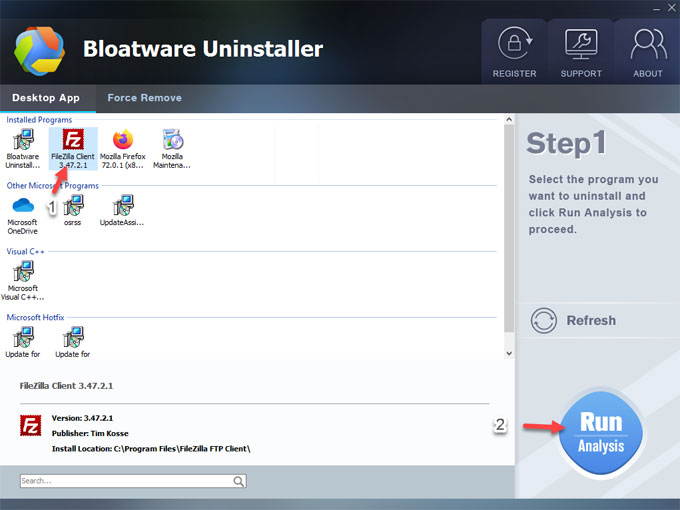
Step 1: Run Bloatware Uninstaller on your computer. You will look at the Step 1 interface where lists all your installed apps. In the same page of Step 1, click FileZilla > click Run Analysis.
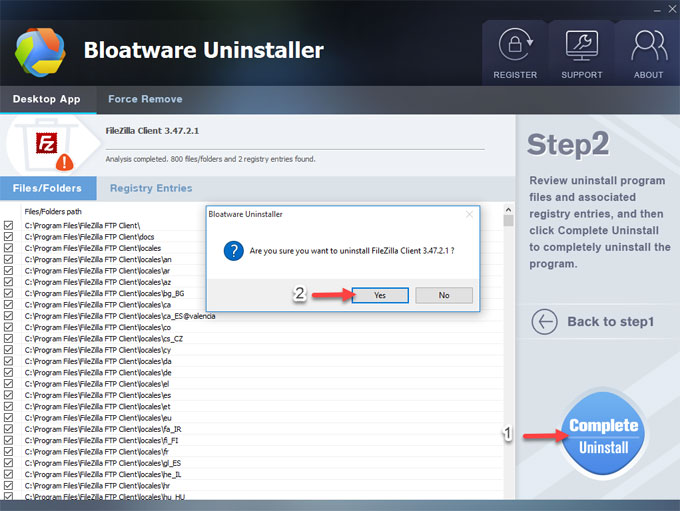
Step 2: Click Complete Uninstall > click Yes to confirm that you want to uninstall FileZilla software from your computer.
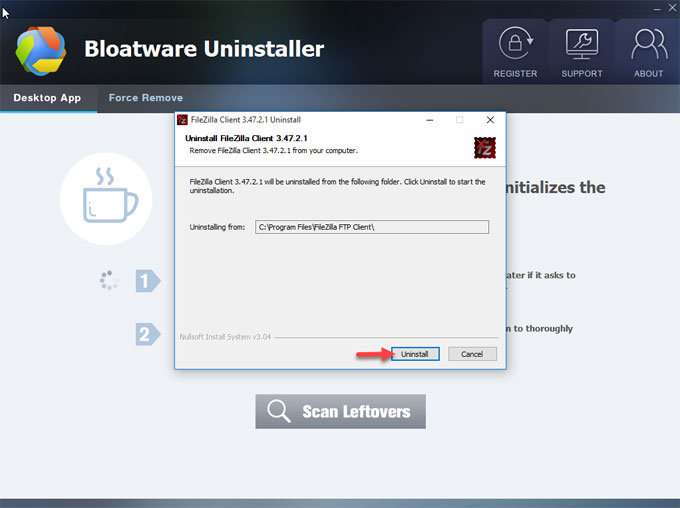
Step 3: In the pop-up FileZilla client uninstall window, click Uninstall again to remove it.
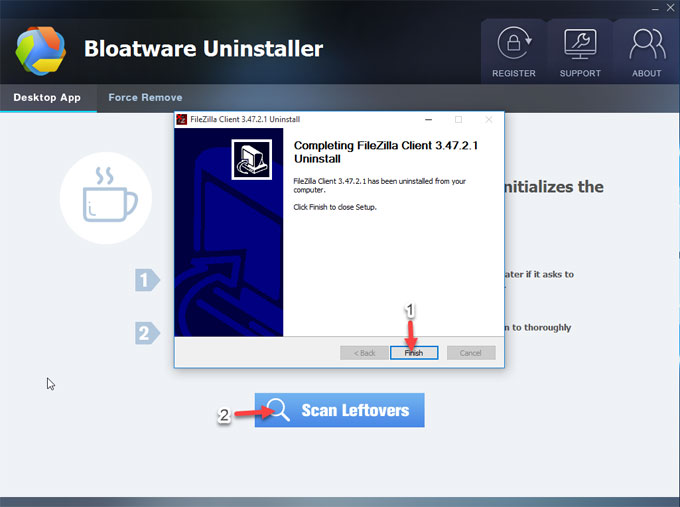
Step 4: Next, you will see the FileZilla software has been removed from your computer. Click Finish to close the window. Click Scan Leftovers to collect all left files related with FileZilla.
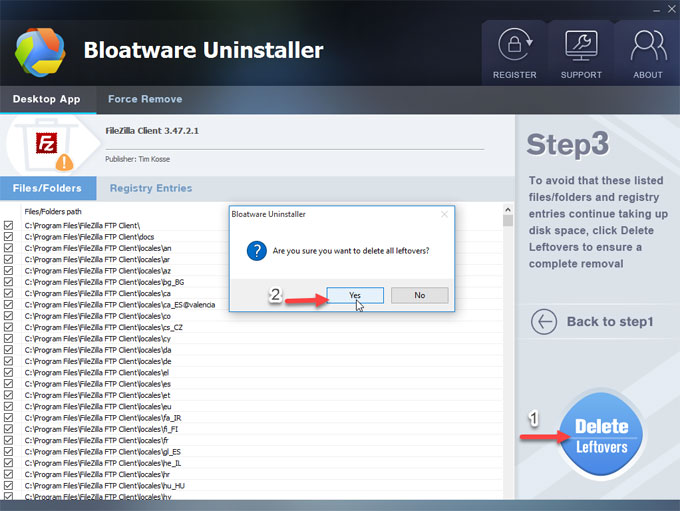
Step 5: Click Delete Leftovers > click Yes to make sure you want to clean out all leftovers.
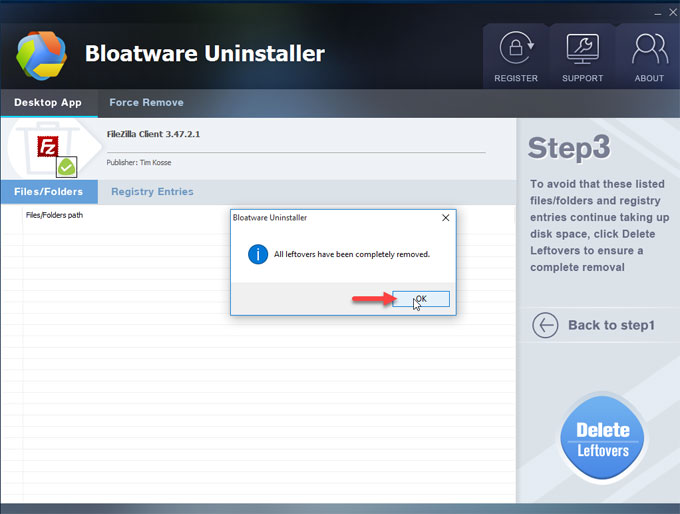
Step 6: All left files, folders, and entries have been removed completely. Click OK and quit Bloatware Uninstaller. Restart your computer.
Video guide: If you want to get a more intuitive tutorial on how to uninstall FileZilla using the professional Bloatware Uninstaller tool, refer to an easy video as followed.
Read more how to uninstall tutorials related with FileZilla:
- How can Uninstall Filezilla Password Decoder Completely from Computer
- How can Uninstall FileZilla Portable Completely from Computer
- How can Uninstall FileZilla Server Completely from Computer
- How can Uninstall FileZillaCrypt Completely from Computer
Conclusion
This guide details the methods of FileZilla removal, right for anyone who want to start a cleaning in Windows System. By the end of this guide you will understand the easy-to-use solutions of uninstalling a program from computers in Windows. You will know how to uninstall FileZilla by your own hands or a professional uninstaller tool. You will also know how to easily clean out all junk files of any unwanted programs through Bloatware Uninstaller. You will be able to troubleshoot everyday app uninstall related issues. Want to give this professional uninstaller tool a try? Click the download button to obtain it.
Categories
- Acer Software
- Anti-Spyware
- Antivirus Programs
- ASUS Software
- Browsers
- Business Software
- CD Burners
- Cloud Storage
- Communication Tools
- Compression Tools
- Desktop Customization
- Desktop Enhancements
- Developer Tools
- Digital Photo Software
- Driver
- Encryption Software
- Games
- HP Software
- Intel Software
- Interface Tool
- Internet Security Software Suites
- Internet Software
- Keyboard Drivers
- Lenovo Software
- MP3 & Audio Software
- Networking Software
- News
- Operating Systems & Updates
- Other Browser Add-ons & Plugins
- P2P & File-Sharing Software
- Productivity Software
- Security Software
- SEO Tools
- Text Editing Software
- Uncategorized
- Uninstall Backup Software
- Uninstall Download Software
- Uninstall e-book management software
- Uninstall FTP Software
- Uninstall Graphics Software
- Uninstall Monitoring Software
- Uninstall Office Suite Software
- Uninstall PDF Software
- Uninstall Player
- Uninstall Security Software
- Uninstall Utilities
- Utilities & Operating Systems
- Video Editing
- Video Players
- Video Software
- VNC Software
- Web Browsers
- Windows Tutorial
Archives
- June 2021
- April 2021
- March 2021
- February 2021
- January 2021
- December 2020
- November 2020
- October 2020
- September 2020
- August 2020
- July 2020
- June 2020
- May 2020
- April 2020
- March 2020
- February 2020
- January 2020
- December 2019
- November 2019
- August 2019
- July 2019
- June 2019
- May 2019
- April 2019
- March 2019
- February 2019
- January 2019
- December 2018
- November 2018
- October 2018
- September 2018
- August 2018
- July 2018
- June 2018
- May 2018
- April 2018
- March 2018
- February 2018
- January 2018
- December 2017
- November 2017
- October 2017
- September 2017
Comments
Leave a reply