-
How to Fully Uninstall BlueStacks App Player on PC
- May 31,2019
- Utilities & Operating Systems
-
About the program:
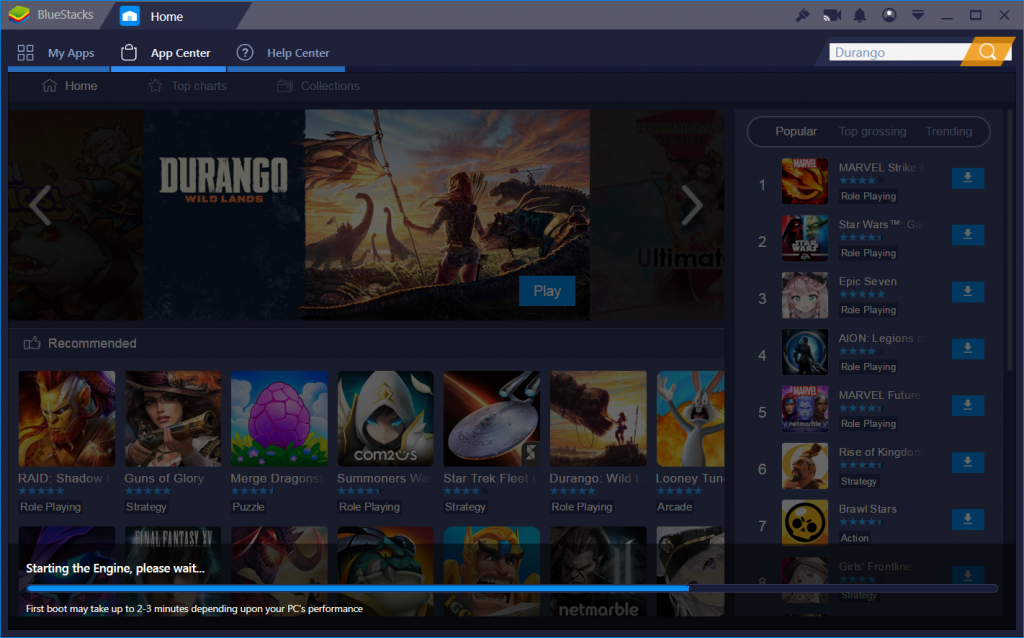
BlueStacks App Player is an Android emulator available for Windows and Mac platforms. The basic features of this software are free to use, but to use the advanced optional feature you need to pay for the monthly subscription. After installing this program on your PC, you will be able to run Android applications within it. The latest version is BlueStacks App Player 4, released on Sept 18, 2018.
Is BlueStacks App Player safe to install? Some antivirus software may detect it as a malware, warning users that this program may be harmful and cause damage to the system. This program may not act as a malware but it does consumes plenty of system memory and RAM, which could slow down your PC. The vendor also mentions that it could create a few problems on Users’ PCs, which are mostly related to performance.
What to do if you want to uninstall BlueStacks App Player from your Windows PC? If you are looking for a way to completely remove it without traces, it is not enough to uninstall it from the Programs & Features pane. Now follow the instructions below.
Activate BlueStacks App Player Uninstaller from Start Menu
Actually BlueStacks App Player comes with a dedicated uninstaller, which can be activated from the Program(Apps) & Features pane. Here are the detailed steps:

Windows 7:
- Hit the Windows key on the keyboard (or click Start icon) and choose Control Panel
- Click the Uninstall a program link under the Programs heading
- Scroll through to locate Acer Portal, and click on Uninstall/Change link above
Windows 8:
- Right click on the Start menu and then choose Programs and Features in the list
- Highlight BlueStacks App Player in the list, and click on the Uninstall/Change link
Windows 10:
- Right click on the Start menu and choose App and Features on the top
- On the right pane, scroll down to locate BlueStacks App Player, and click the entry
- Click the Uninstall button that appears below, and click Uninstall again
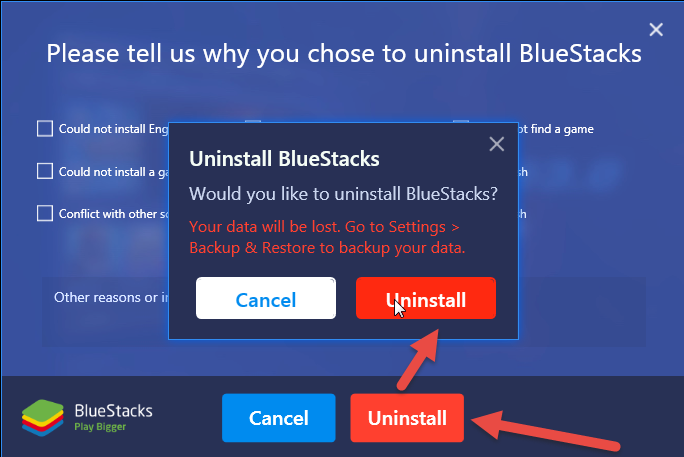
As the BlueStacks App Player uninstaller window pops up, click Uninstall button, and click Uninstall button again. If you want to backup your data for later use, click Settings > Backup & Restore in BlueStacks App Player to export the data. If you don’t want to keep them, just click Uninstall button, and the program will be deleted.
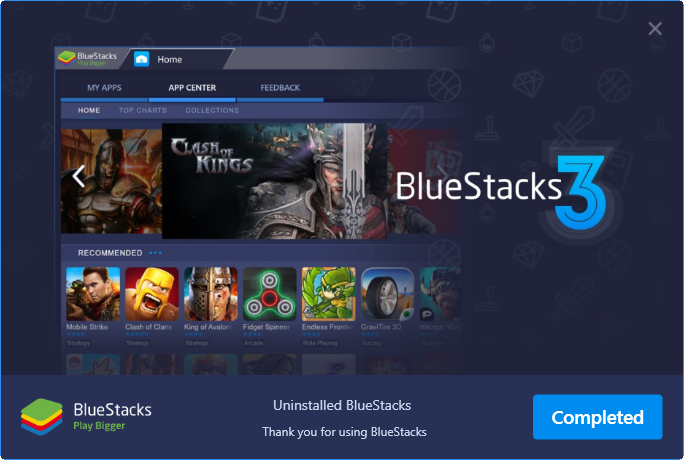
When the uninstallation is finished, click Completed button to exit out of the wizard.
Does everything goes well? Some users may encounter problems in this standard process, like the uninstaller does not show up automatically, or the uninstallation is interrupted by unknown error. How to troubleshoot these issues if you come across?
Trick 1. terminate associated processes before the uninstall
Before uninstalling a software you are supposed to shut it down and terminate associated background processes. Otherwise, error message could arise to interrupt normal uninstallation, and the program components that are in use will not be deleted.
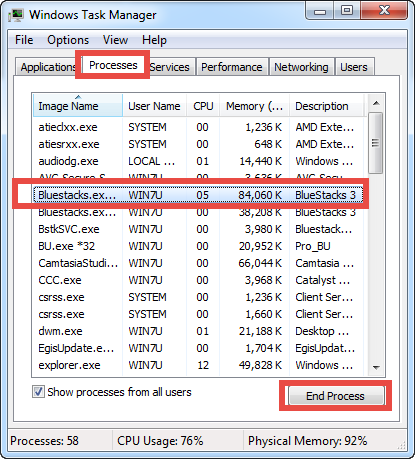
- Right click the taskbar and select Task Manager option
- Select associated background processes in Processes tab
- Click End Task to terminated them one by one
Trick 2: delete invalid entries in Registry after the uninstall
The removal is not thorough if you stop at the steps above. You will need to go further if you wish to clean up BlueStacks App Player traces in the Windows Registry.
- (Right) click Start and then click Run to launch Run dialog box
- Type “regedit” in the Open: box and press Enter to activate Registry Editor
- If you are prompted by UAC for confirmation, click Yes
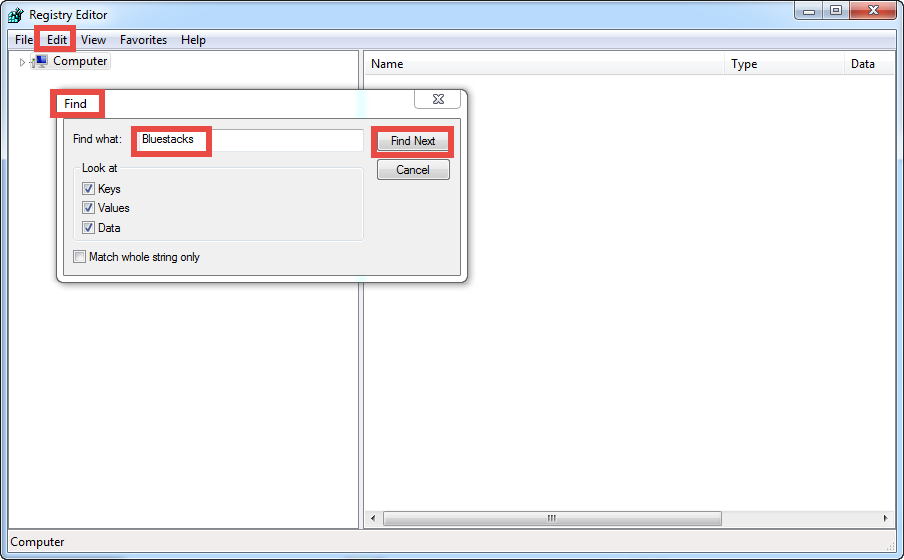
- Click Find on the Edit menu in the Registry Editor
- Type the keyword(s) of BlueStacks App Player or its vendor in the search box
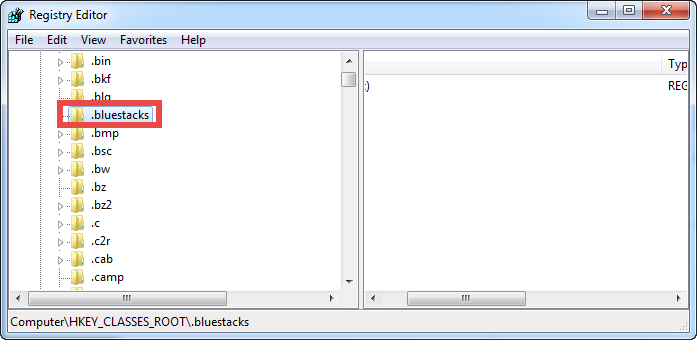
- Click Find Next (and then hit F3) to locate and delete associated keys/values
Warning: don’t make any modification on Registry before backing up the whole database. If you mistakenly delete something in it, you can still reverse the change.
Try to Uninstall BlueStacks App Player in Several Clicks
Can’t believe you can uninstall a program like BlueStacks App Player in just a few clicks? There is no complicated actions to take or program traces left in the system. How to achieve the perfect removal of BlueStacks App Player? Use Bloatware Uninstaller. A video tutorial is provided below to show you the whole procedure:
Step 1. Select target program
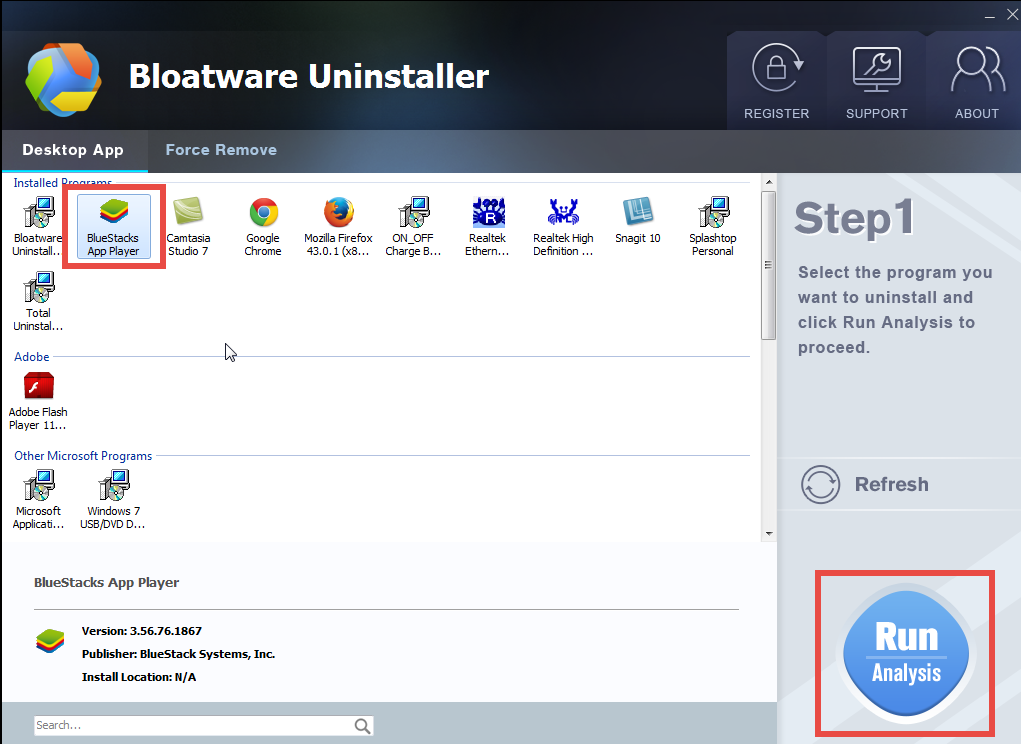
- Double click to run Bloatware Uninstaller and scan all installed programs
- Select BlueStacks App Player in the list and then click Run Analysis button
Step 2. Scan for program files
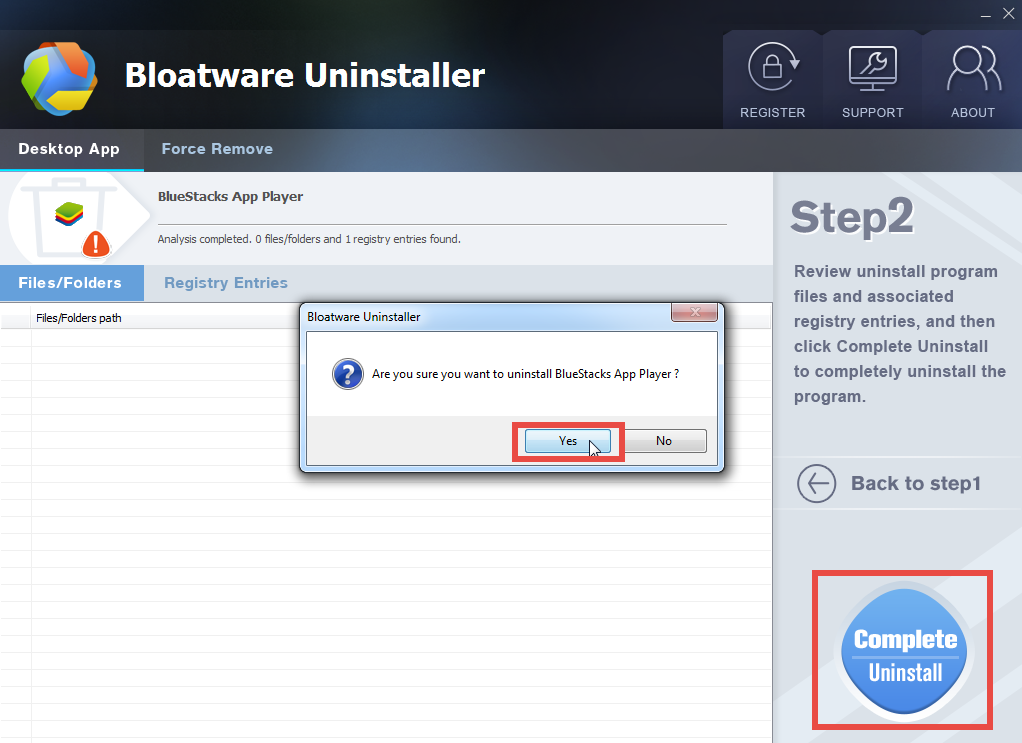
- After the scanning is done, click Complete Uninstall to activate default uninstaller
- Click Yes in pop-up window and follow the prompts to complete uninstallation
- Click Scan Leftovers to search for BlueStacks App Player leftovers in the system
Step 3. Perform final uninstall
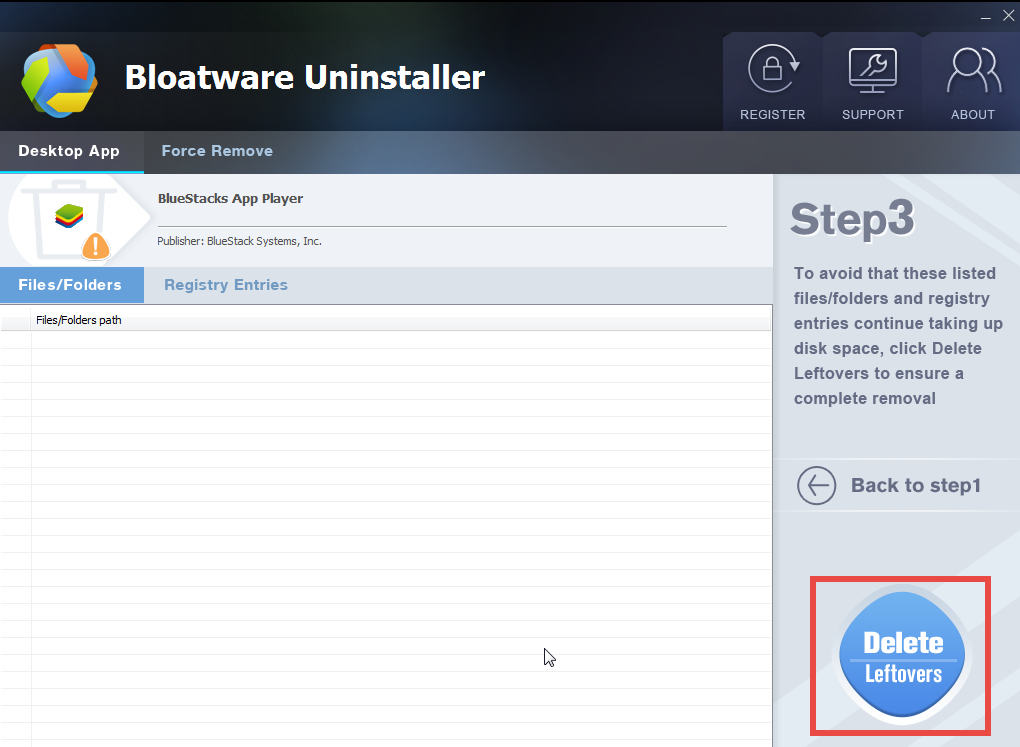
- Keep every box ticked and click Delete Leftover to start thorough removal
- Click Yes in the dialogue to permanently delete all BlueStacks App Player leftovers
Then how to get Bloatware Uninstaller? You can download it through the homepage of this site, but please note that it is a paid software, which requires a valid license to complete the removal. Think about the convenience it brings and make your choice.
What other questions you want to know about uninstalling BlueStacks App Player?
Categories
- Acer Software
- Anti-Spyware
- Antivirus Programs
- ASUS Software
- Browsers
- Business Software
- CD Burners
- Cloud Storage
- Communication Tools
- Compression Tools
- Desktop Customization
- Desktop Enhancements
- Developer Tools
- Digital Photo Software
- Driver
- Encryption Software
- Games
- HP Software
- Intel Software
- Interface Tool
- Internet Security Software Suites
- Internet Software
- Keyboard Drivers
- Lenovo Software
- MP3 & Audio Software
- Networking Software
- News
- Operating Systems & Updates
- Other Browser Add-ons & Plugins
- P2P & File-Sharing Software
- Productivity Software
- Security Software
- SEO Tools
- Text Editing Software
- Uncategorized
- Uninstall Backup Software
- Uninstall Download Software
- Uninstall e-book management software
- Uninstall FTP Software
- Uninstall Graphics Software
- Uninstall Monitoring Software
- Uninstall Office Suite Software
- Uninstall PDF Software
- Uninstall Player
- Uninstall Security Software
- Uninstall Utilities
- Utilities & Operating Systems
- Video Editing
- Video Players
- Video Software
- VNC Software
- Web Browsers
- Windows Tutorial
Archives
- June 2021
- April 2021
- March 2021
- February 2021
- January 2021
- December 2020
- November 2020
- October 2020
- September 2020
- August 2020
- July 2020
- June 2020
- May 2020
- April 2020
- March 2020
- February 2020
- January 2020
- December 2019
- November 2019
- August 2019
- July 2019
- June 2019
- May 2019
- April 2019
- March 2019
- February 2019
- January 2019
- December 2018
- November 2018
- October 2018
- September 2018
- August 2018
- July 2018
- June 2018
- May 2018
- April 2018
- March 2018
- February 2018
- January 2018
- December 2017
- November 2017
- October 2017
- September 2017
Comments
Leave a reply